# Claude installation guide
> Install the Version Story plugin in Claude as an organization owner, as a member of an organization that already has it, or on a personal account.
[Download the plugin](https://assets.versionstory.com/plugins/version-story-mcp-plugin.plugin)
You will need:
- A Version Story account
- The Claude desktop app or claude.ai
Installing the plugin is one step: add the plugin in Claude's plugin settings. Everything
else — signing in, transferring documents, saving redlines — the plugin handles itself, and
there is no network allowlist to configure. The one capability the plugin does require is
**Cloud code execution and file creation**. See the [plugin overview](/developers/plugin/overview)
for what it does and why.
Pick the path that applies below. If your team has already added Version Story in
organization settings, open **Set up as a member of an organization**.
Set up for an organization
An owner uploads the plugin once for the whole organization, releases it to members, and turns
on code execution. Each member then adds it by following **Set up as a member of an
organization** below.
### 1. Add the plugin
1. Download the plugin:
[version-story-mcp-plugin.plugin](https://assets.versionstory.com/plugins/version-story-mcp-plugin.plugin).
Your browser saves it to your Downloads folder.
2. Open **Organization settings** and go to **Plugins** (under Libraries & Access).
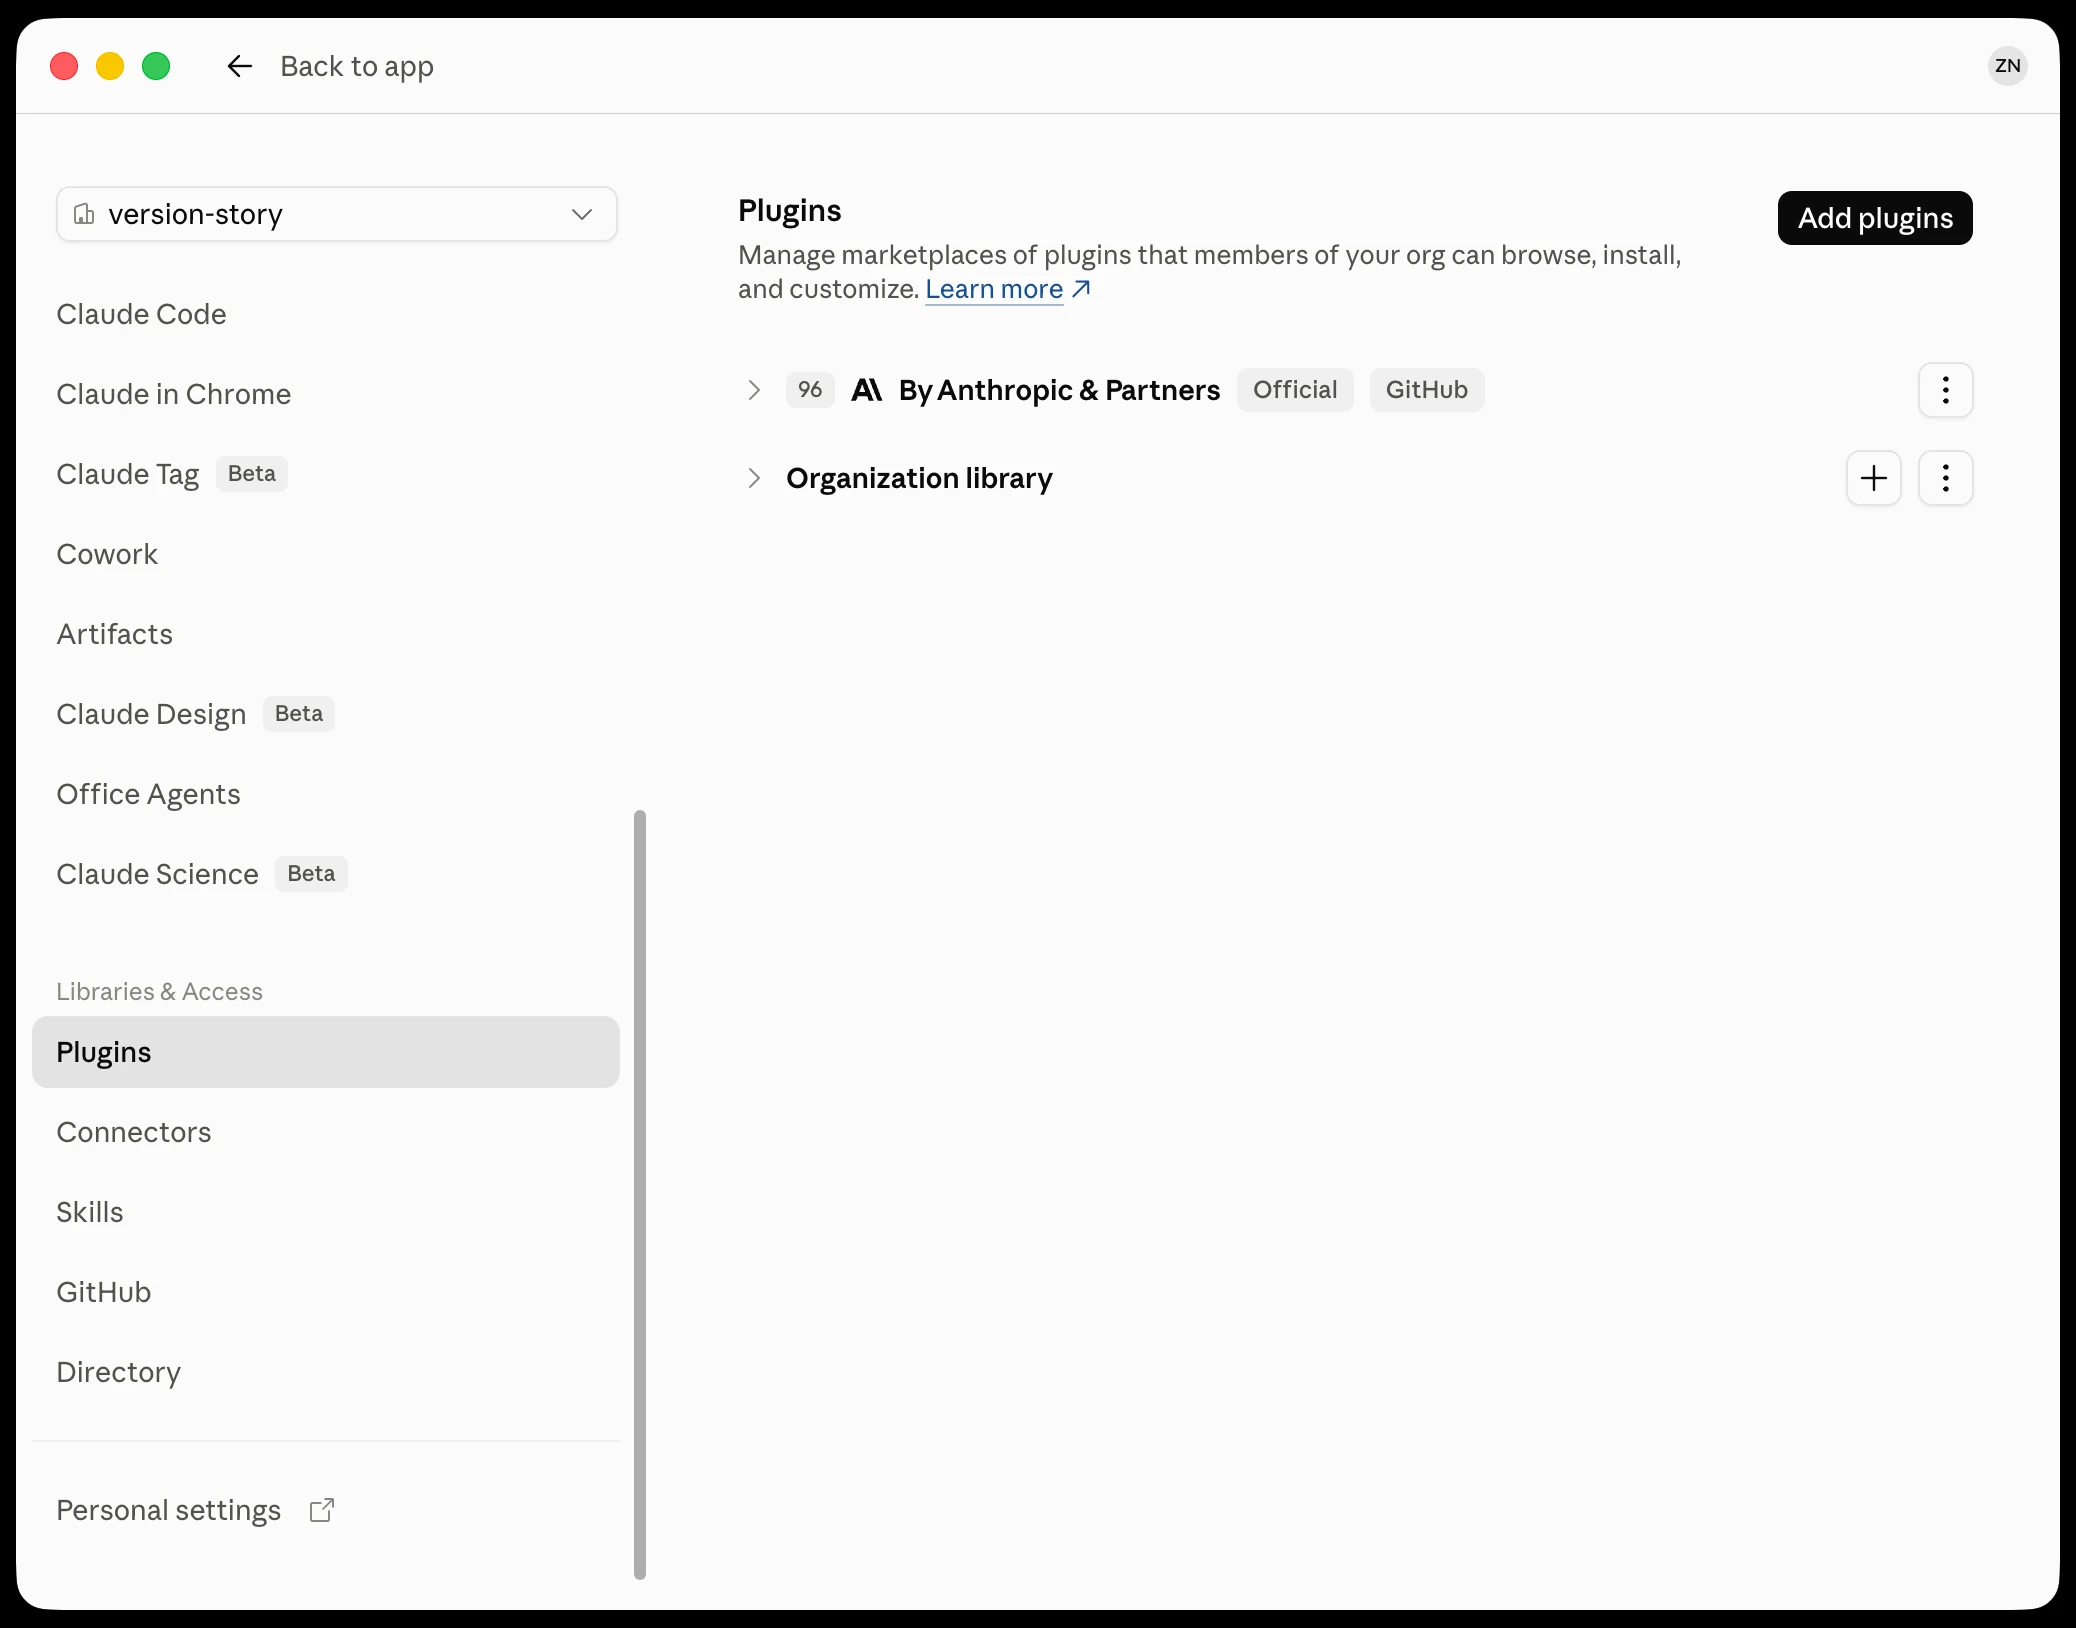
3. Click **Add plugins → Upload a file**.
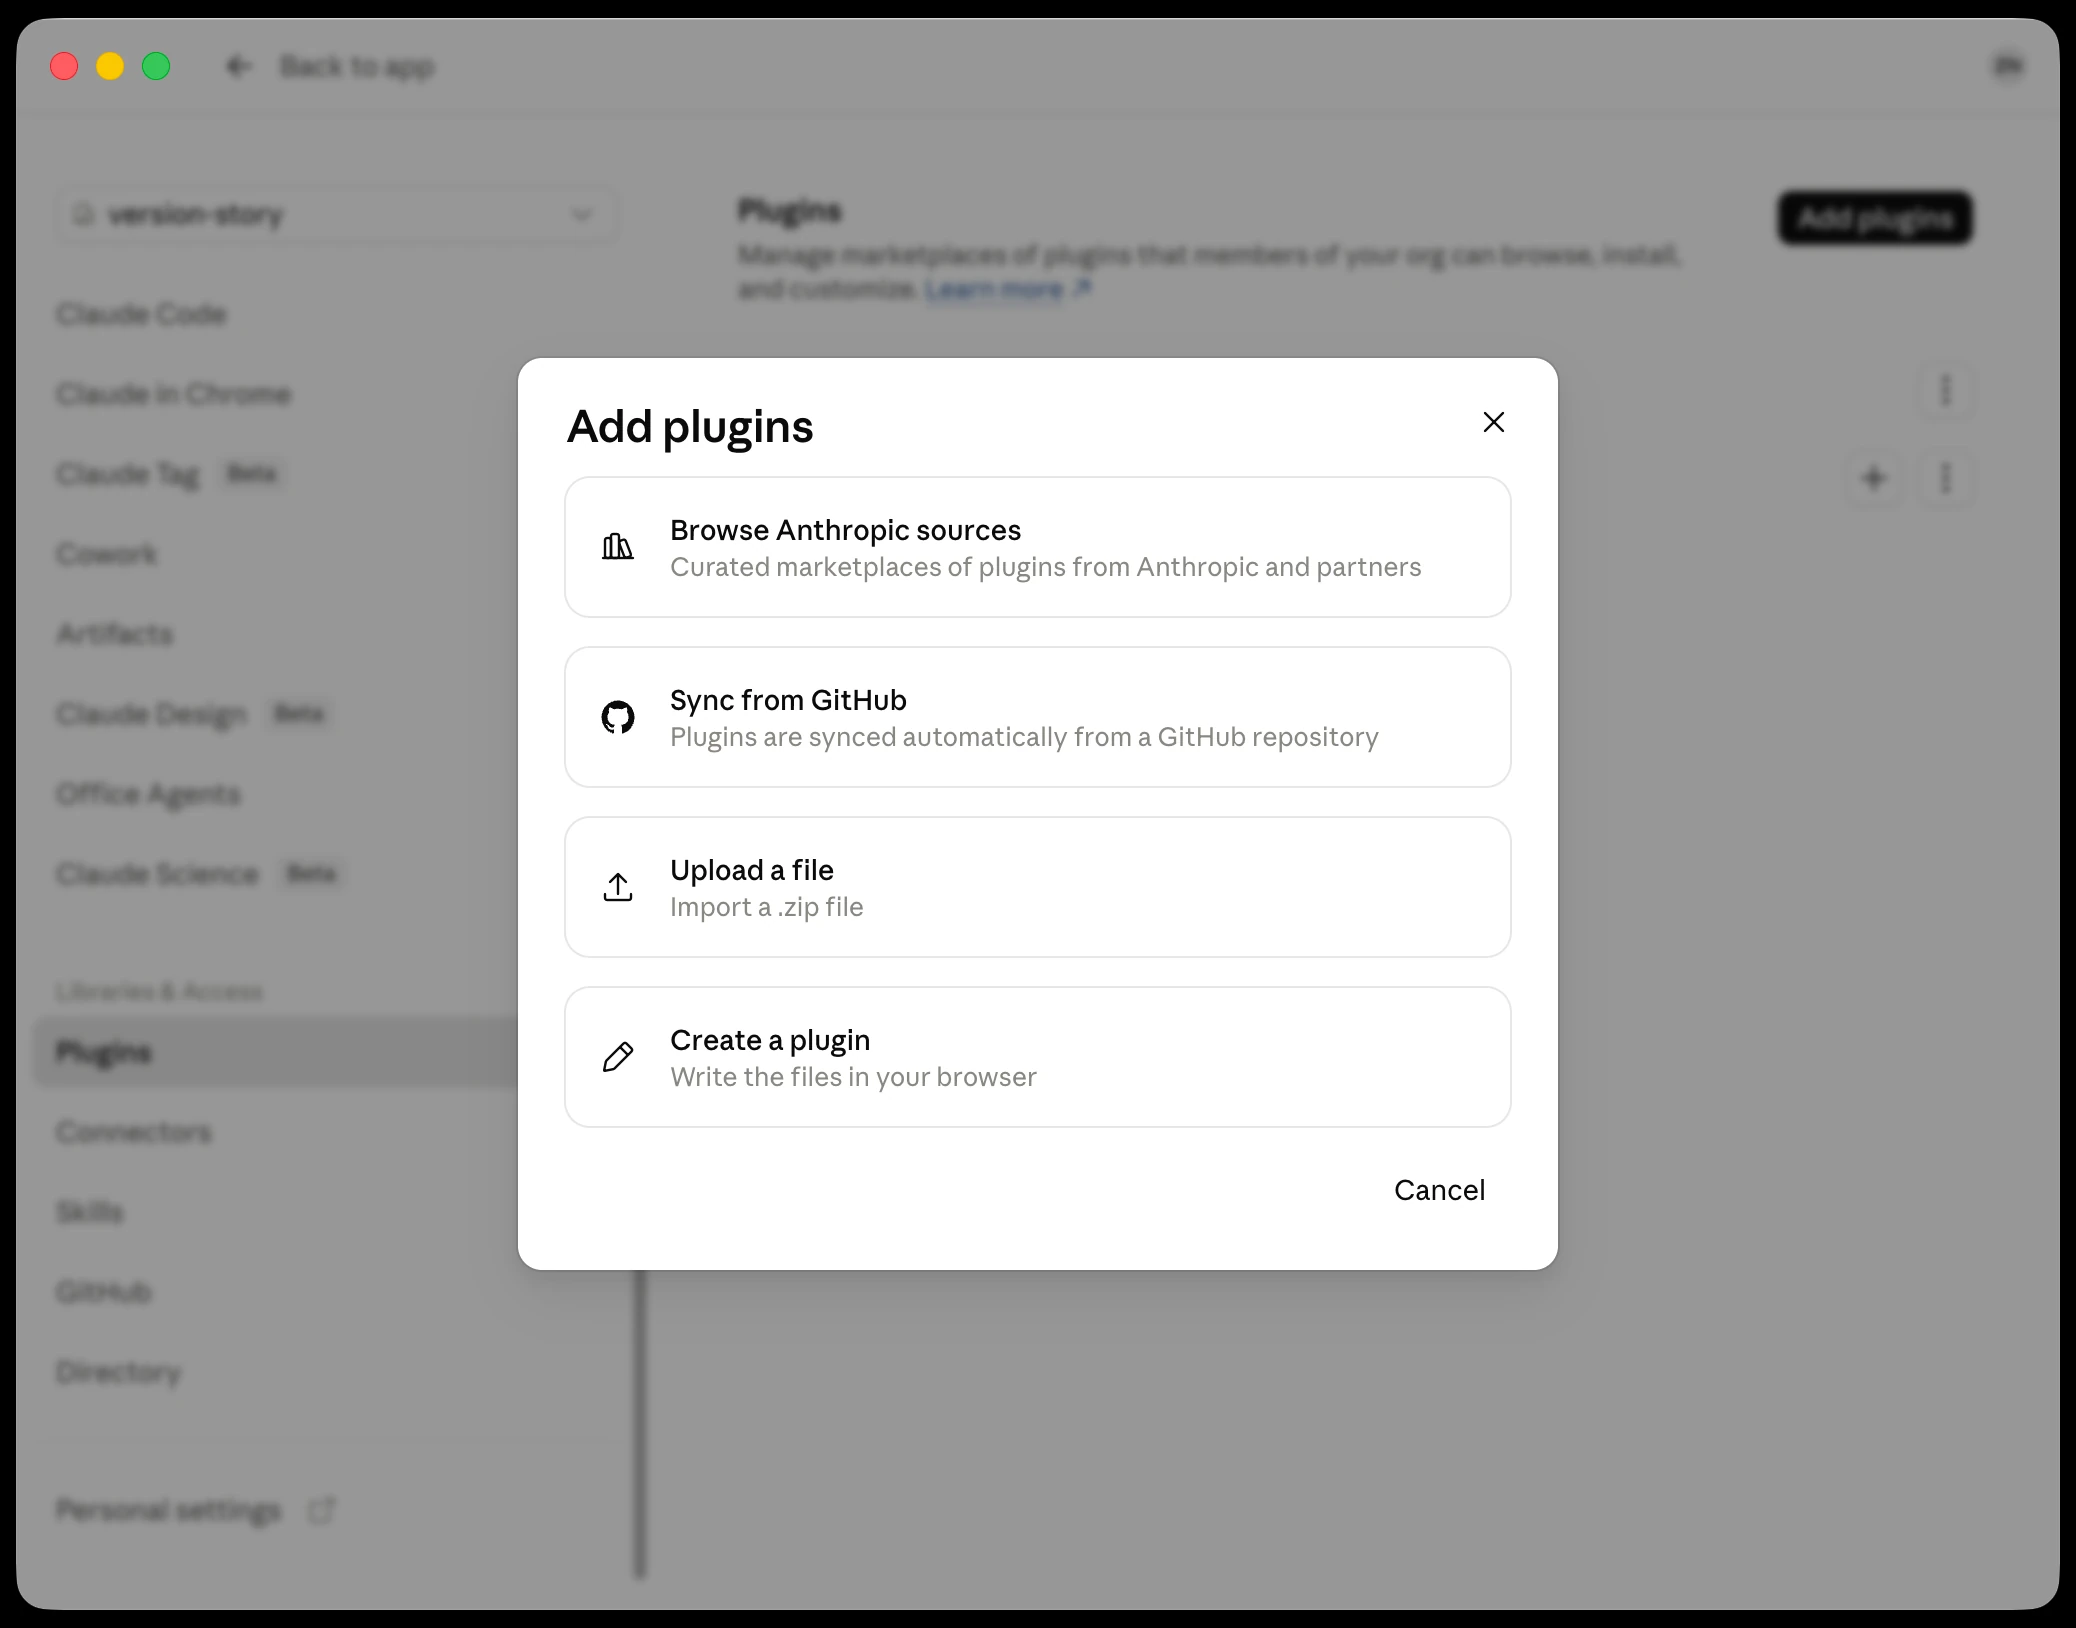
4. Choose the `version-story-mcp-plugin.plugin` file you just downloaded and click **Upload**.
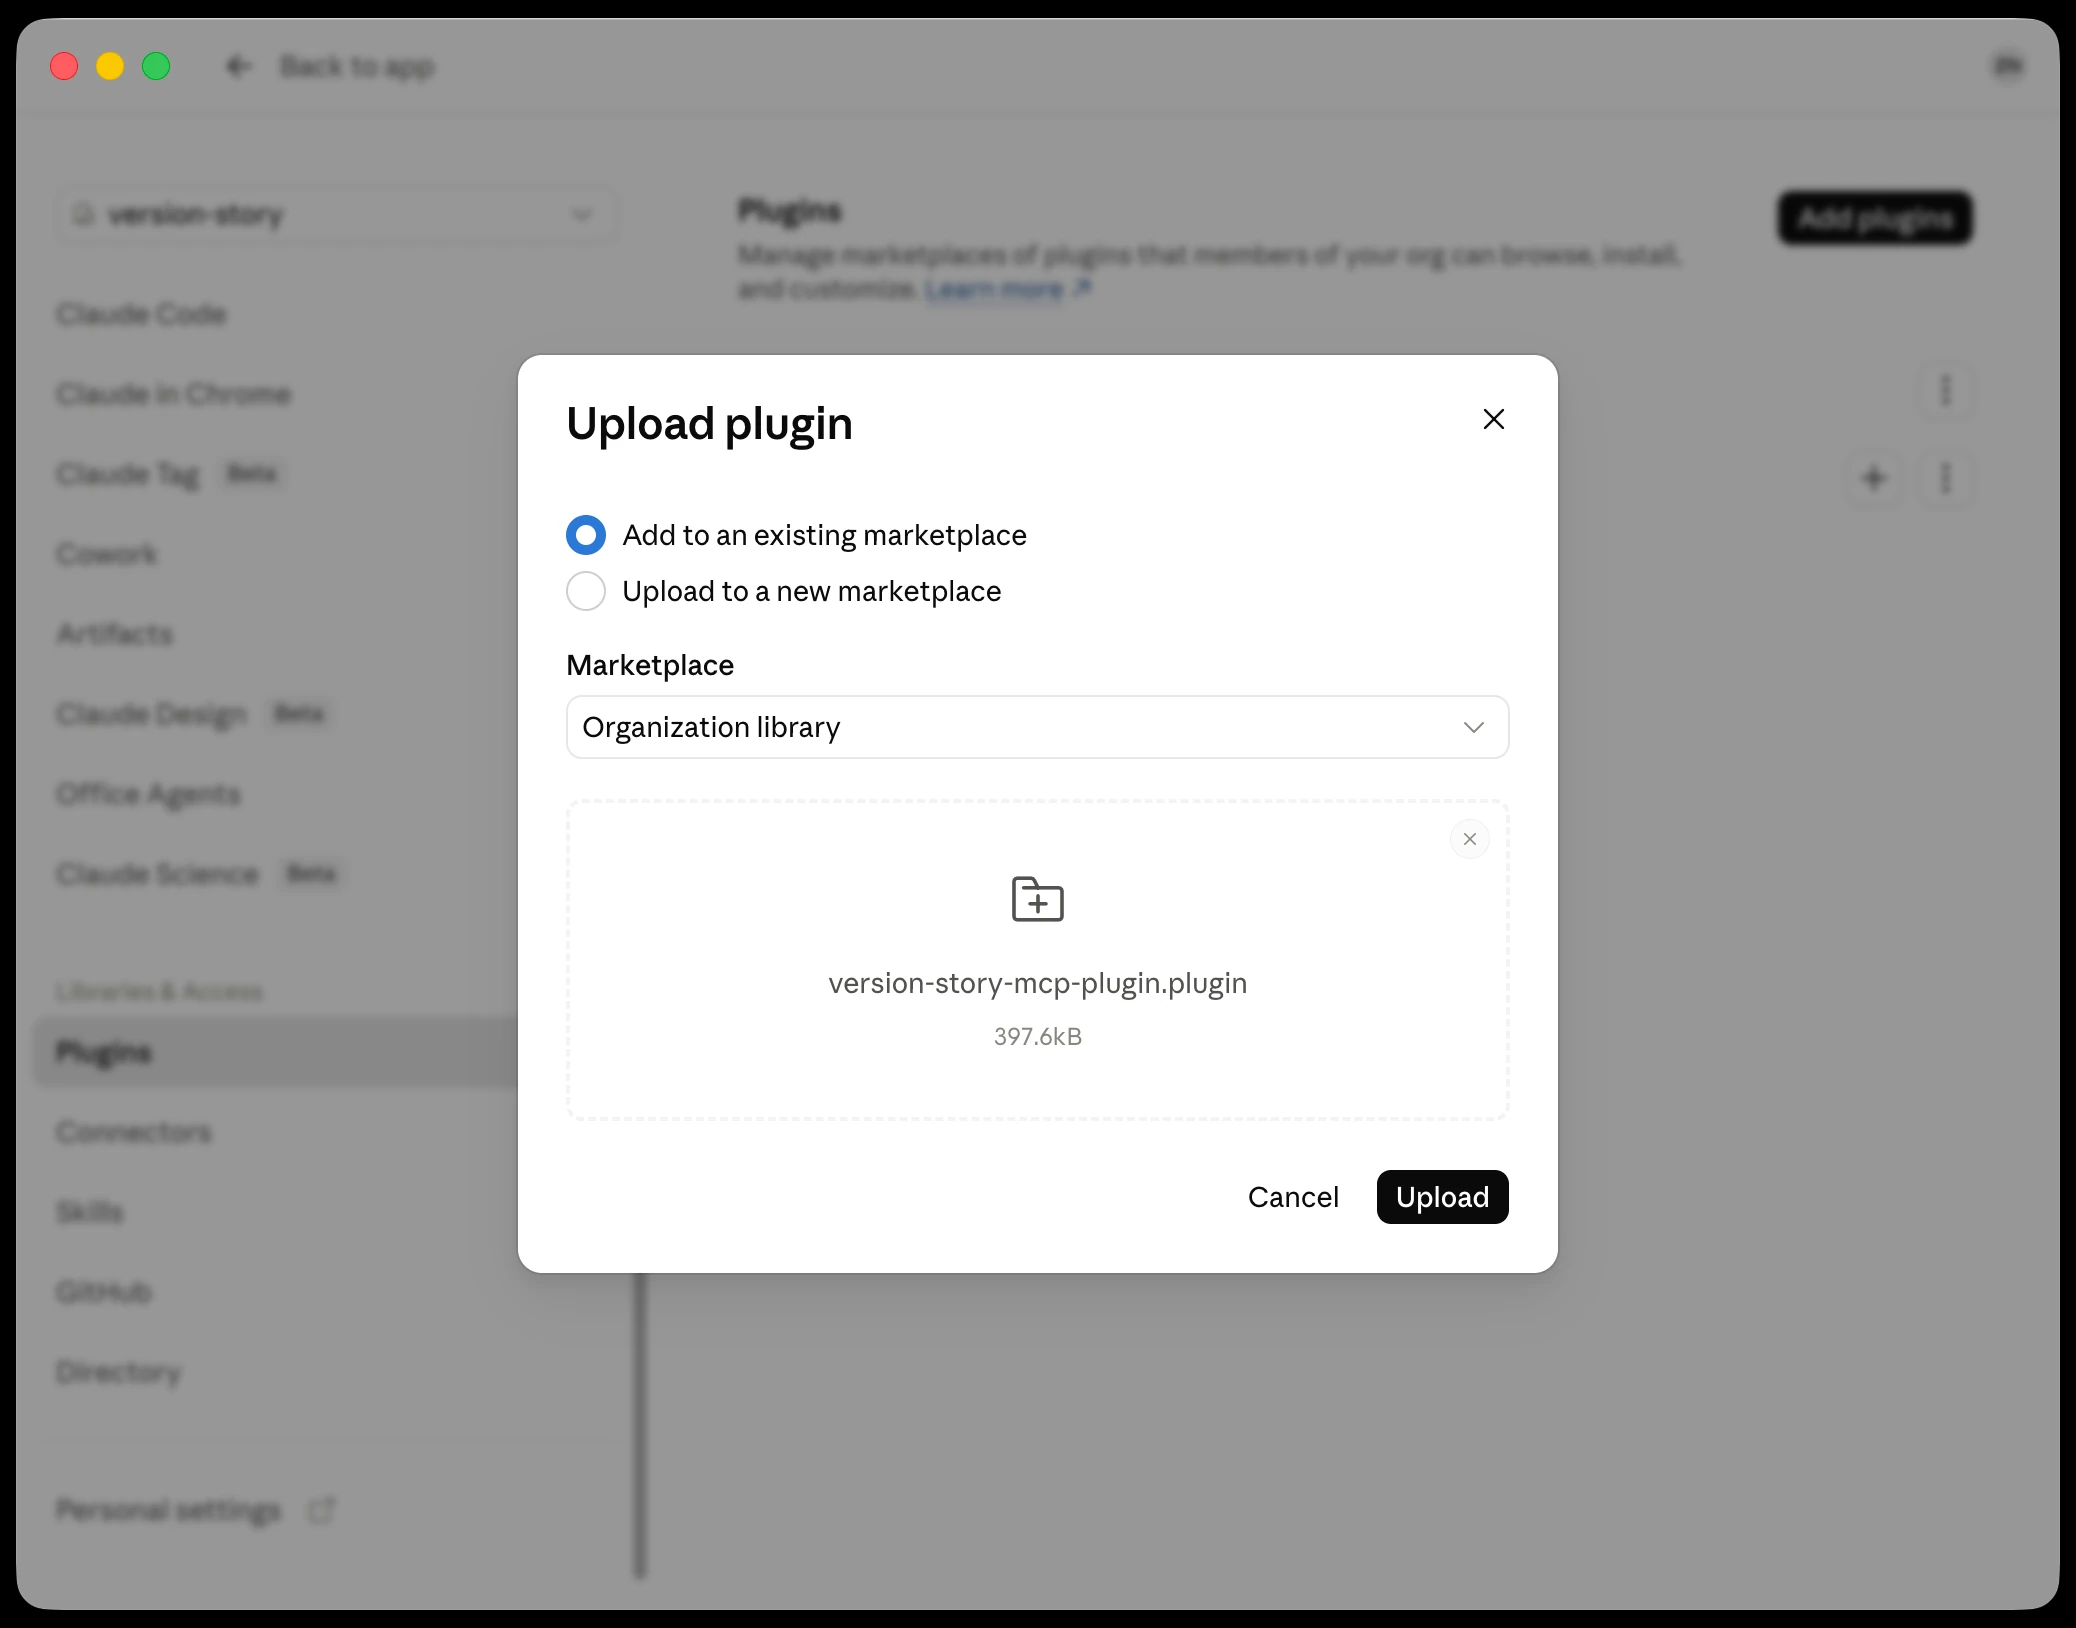
5. Set **User access** to **Available to install**. This step is not optional — a newly
uploaded plugin starts as **Not available**, which hides it from every member's plugin
directory, and members get no error explaining why they cannot find it.
- **Installed by default** and **Required** add it for every member instead, with no action
on their part. Members then skip straight to **Update your system prompt**.
- Uploading a newer Version Story plugin with the same name replaces the installed version,
so this is also how you push an update. Changes reach each member on their next session.
### 2. Enable code execution
An owner turns on code execution once for the whole organization.
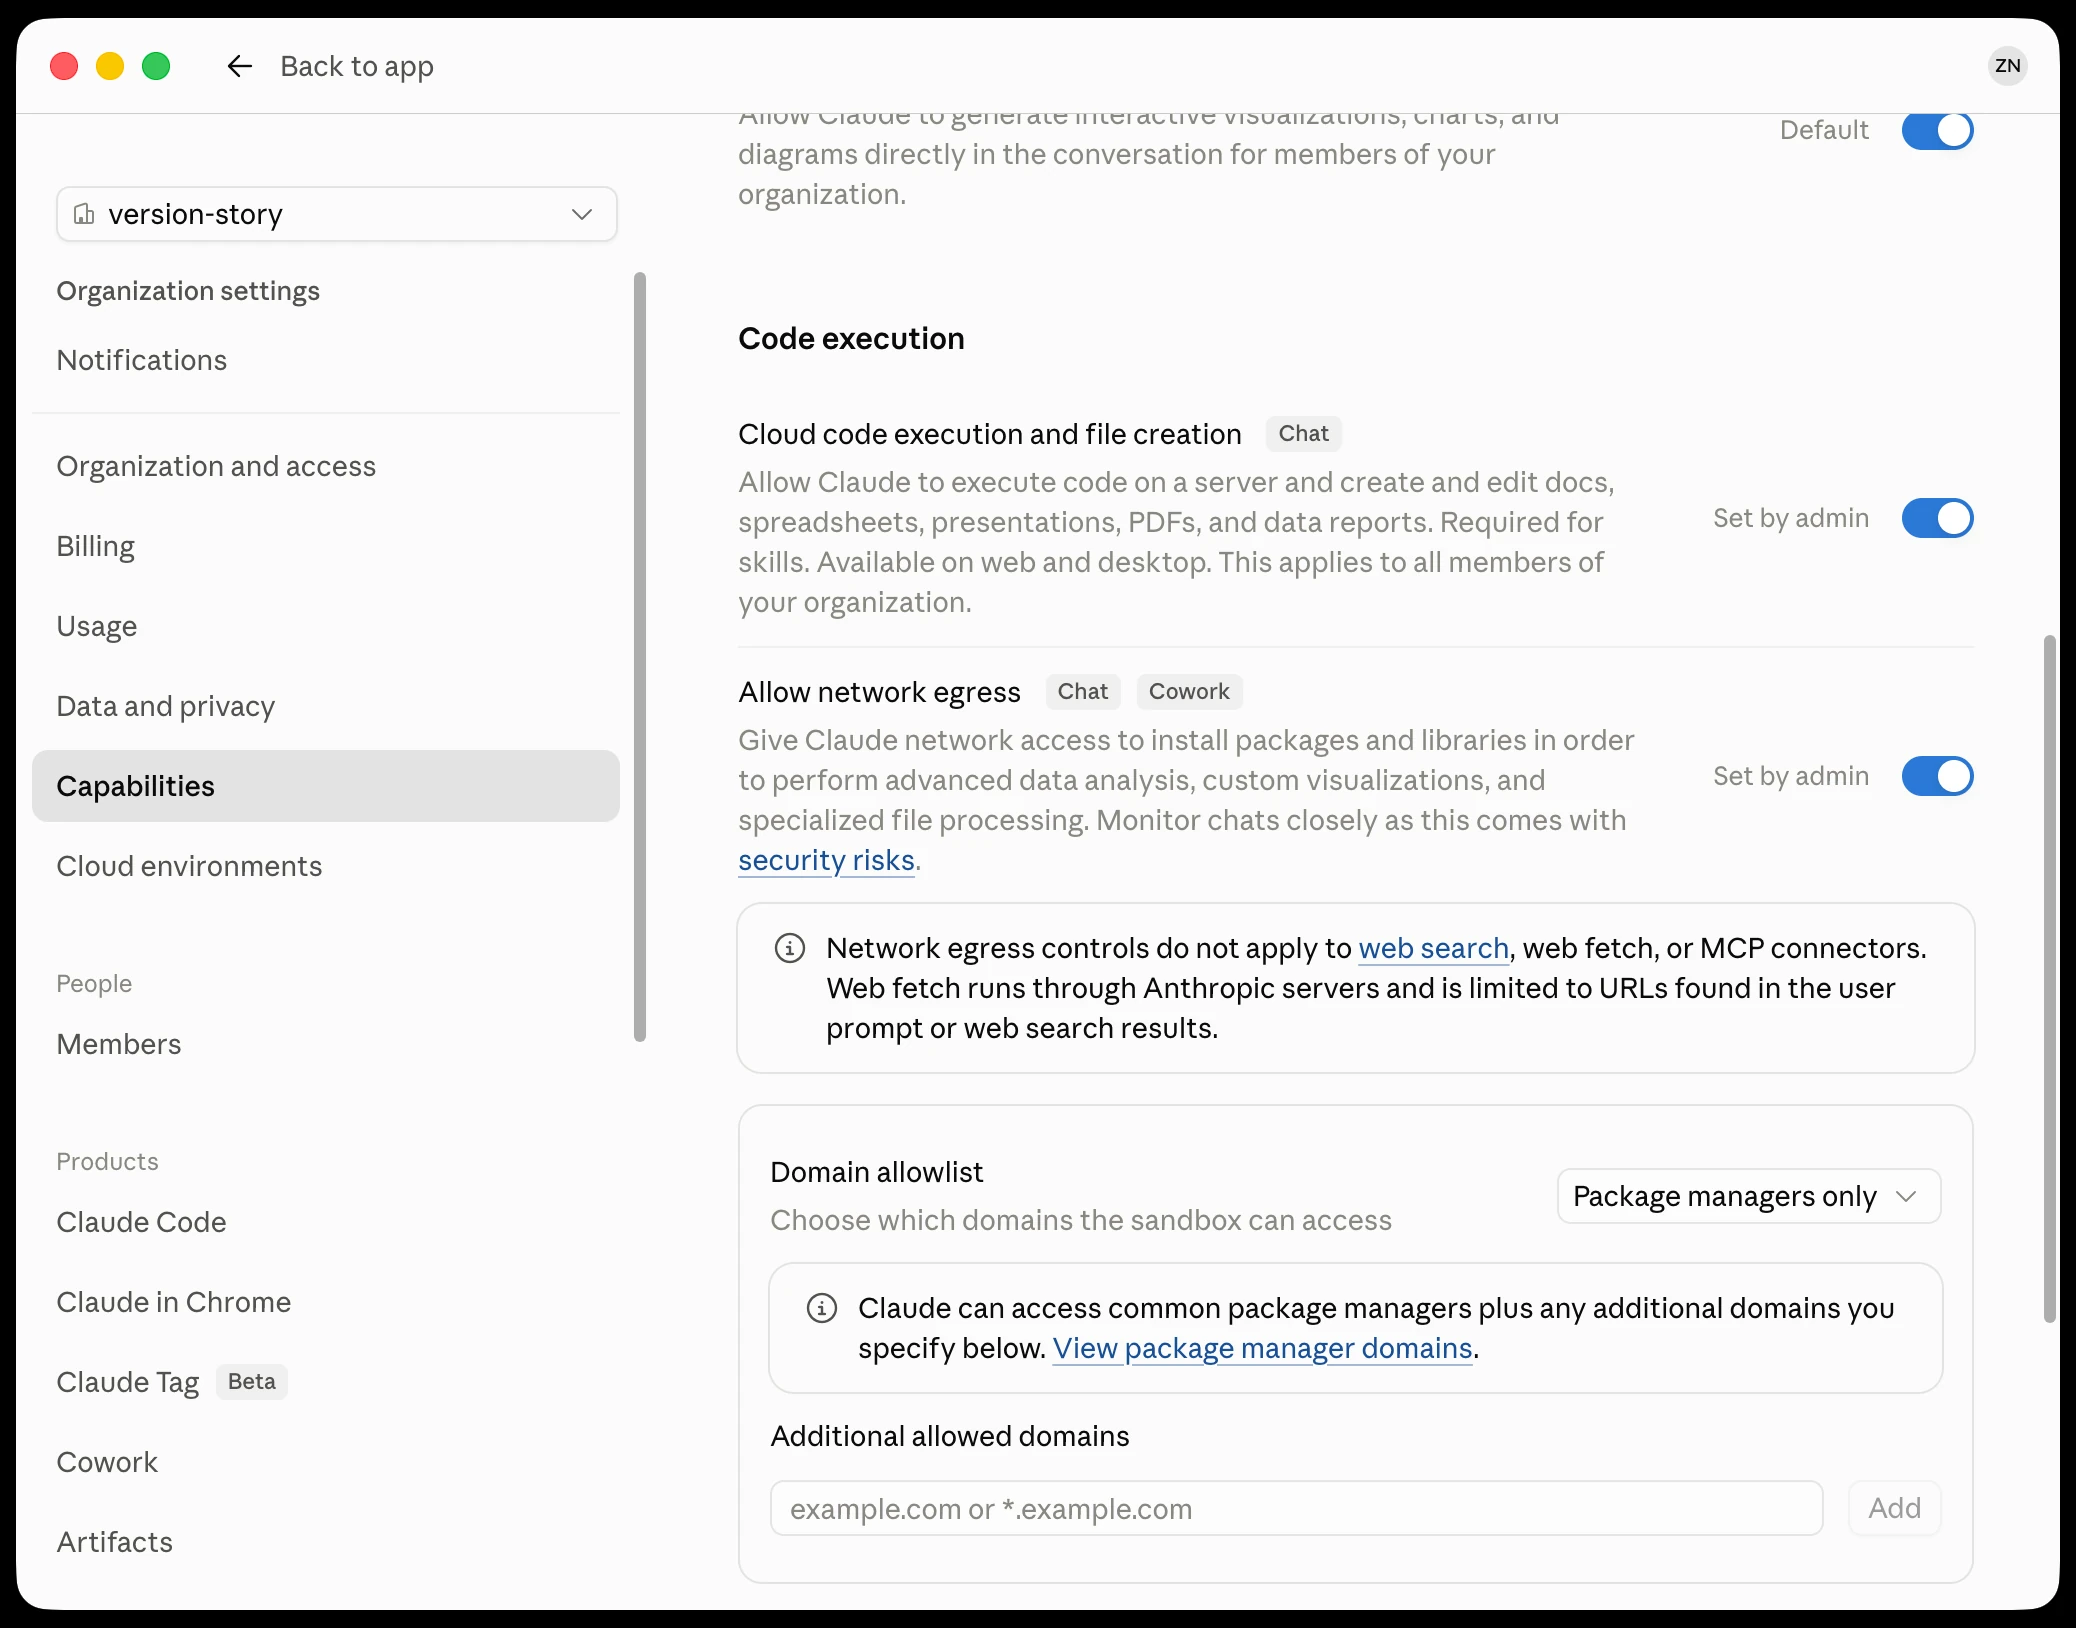
1. Open **Capabilities** in Organization settings and make sure **Cloud code execution and file
creation** is turned on. Members cannot use the plugin without it.
- Network egress and the domain allowlist can stay as they are. The plugin transfers
documents from its own process, so it needs neither.
Set up as a member of an organization
An owner has already uploaded Version Story in Organization settings and turned on code
execution, so there is nothing to download or configure. The plugin is waiting in your plugin
directory. Add it once on your own account and it is ready to use.
### 1. Install the plugin
1. Open **Settings → Customize → Plugins**. Version Story is listed on the **Discover** tab,
marked as coming from your organization.
- If it is not there, an owner has uploaded it but has not released it yet. Ask them to set
**User access** to **Available to install** in Organization settings — plugins start out
hidden.
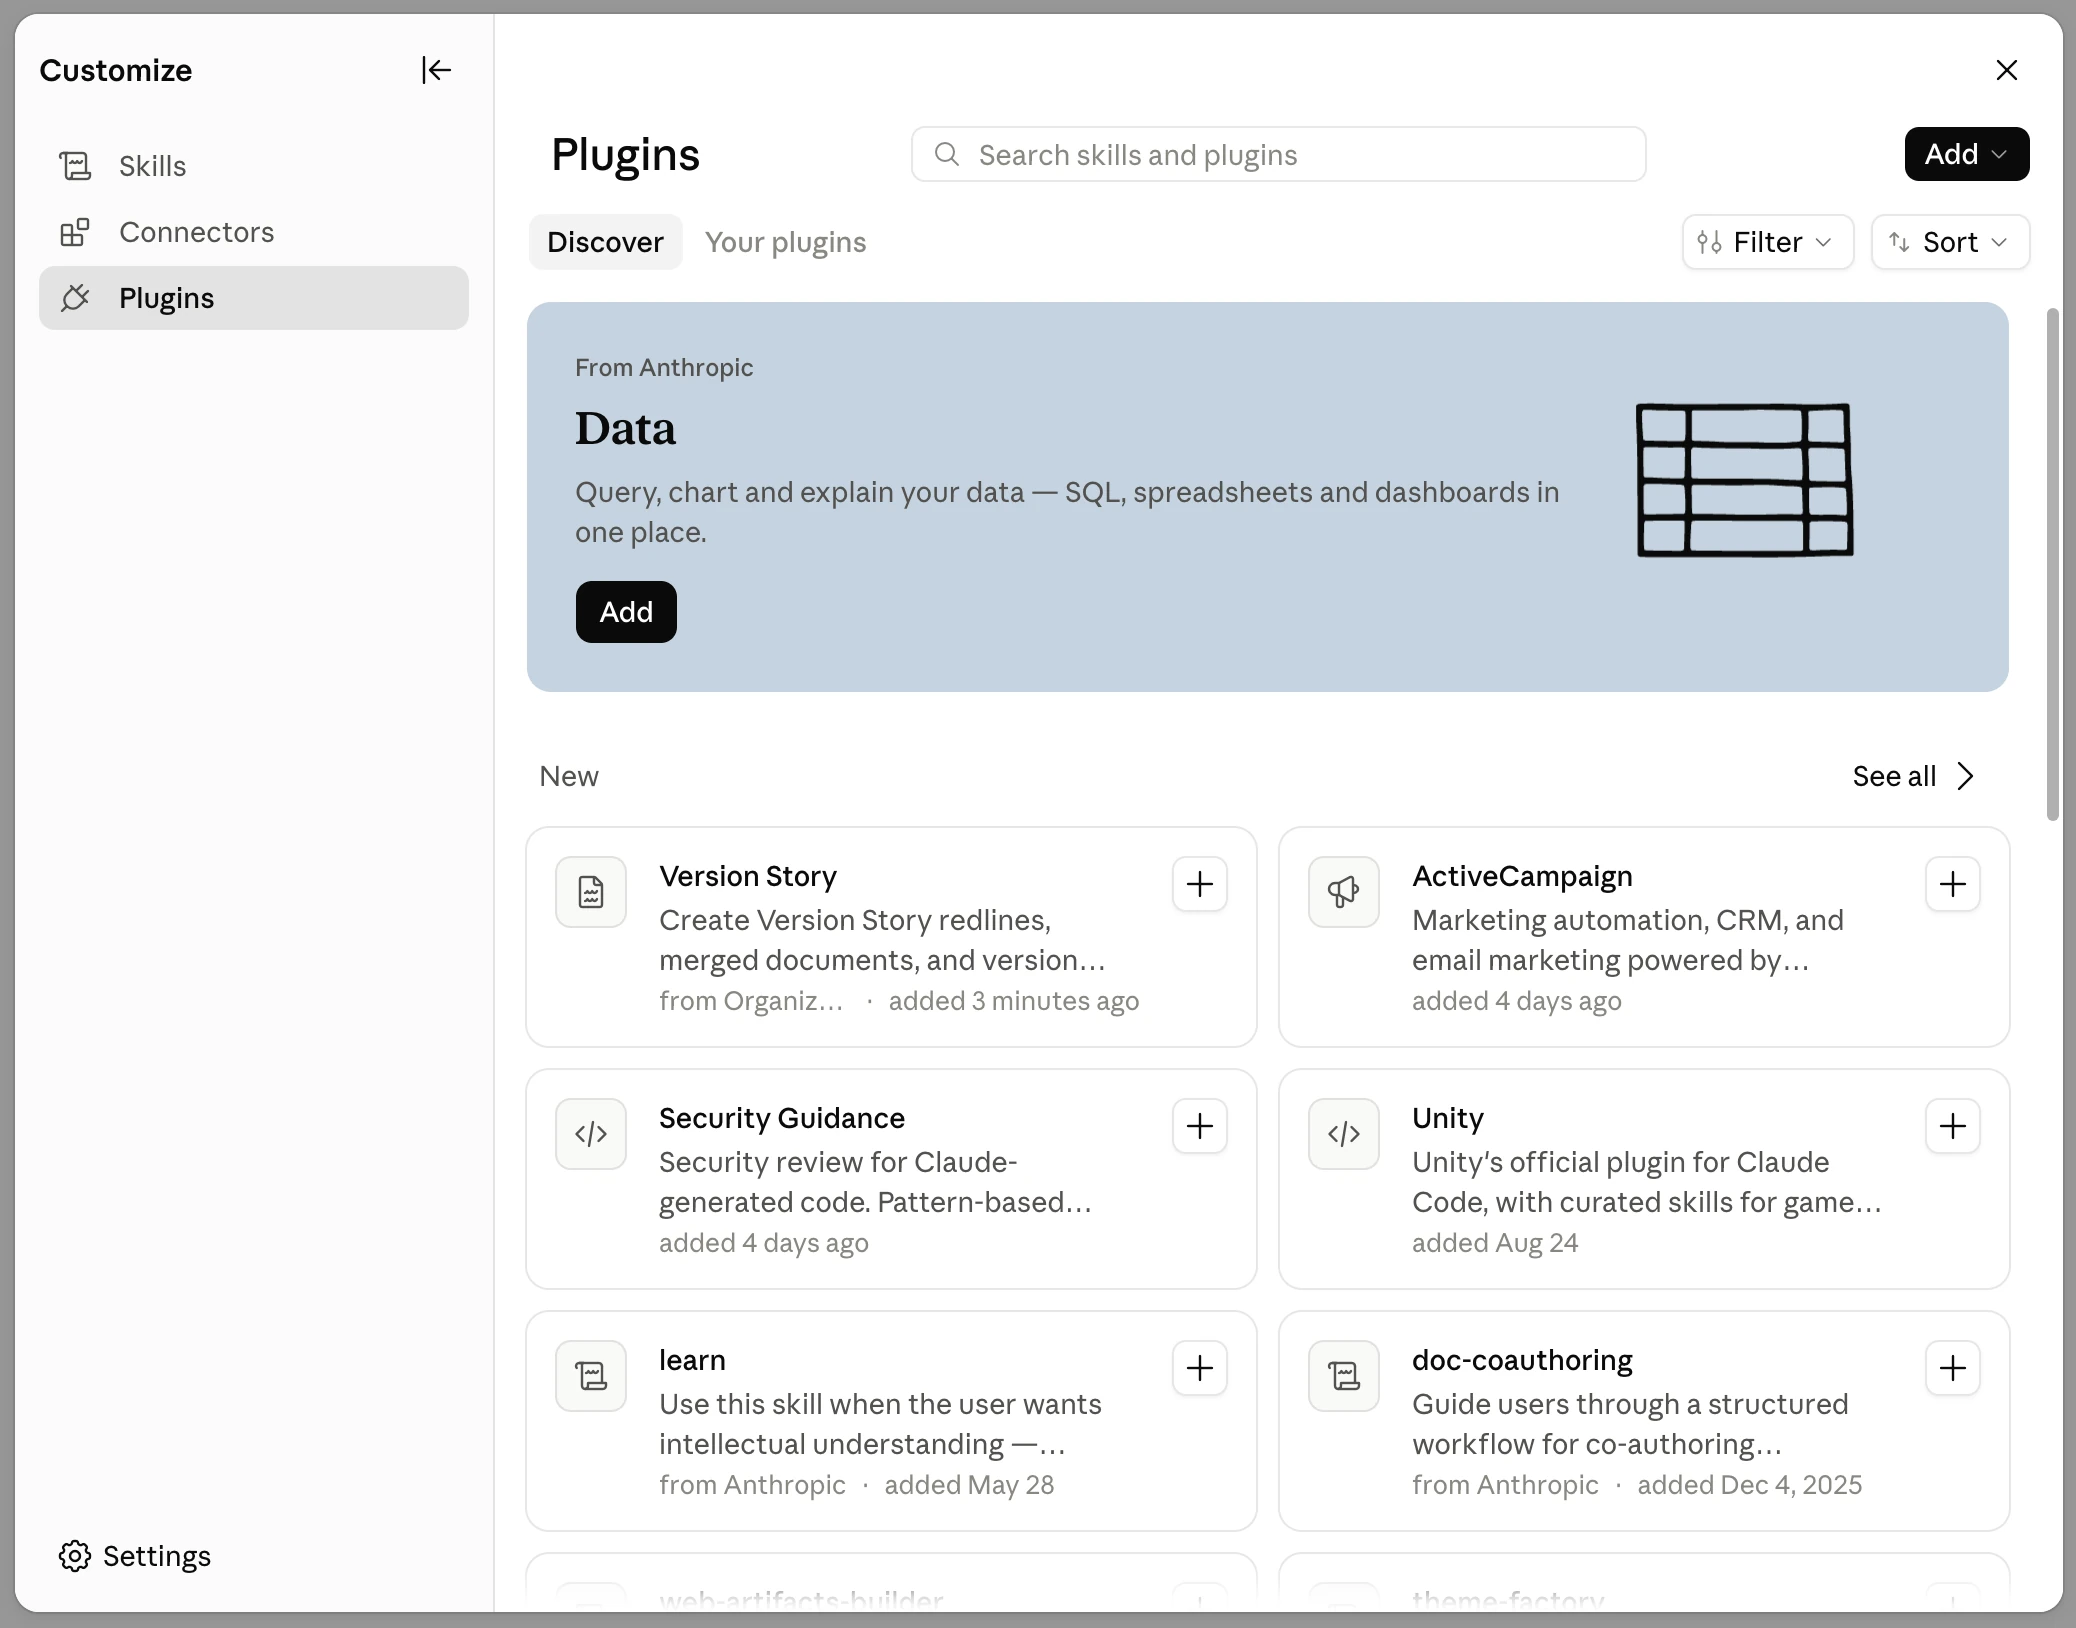
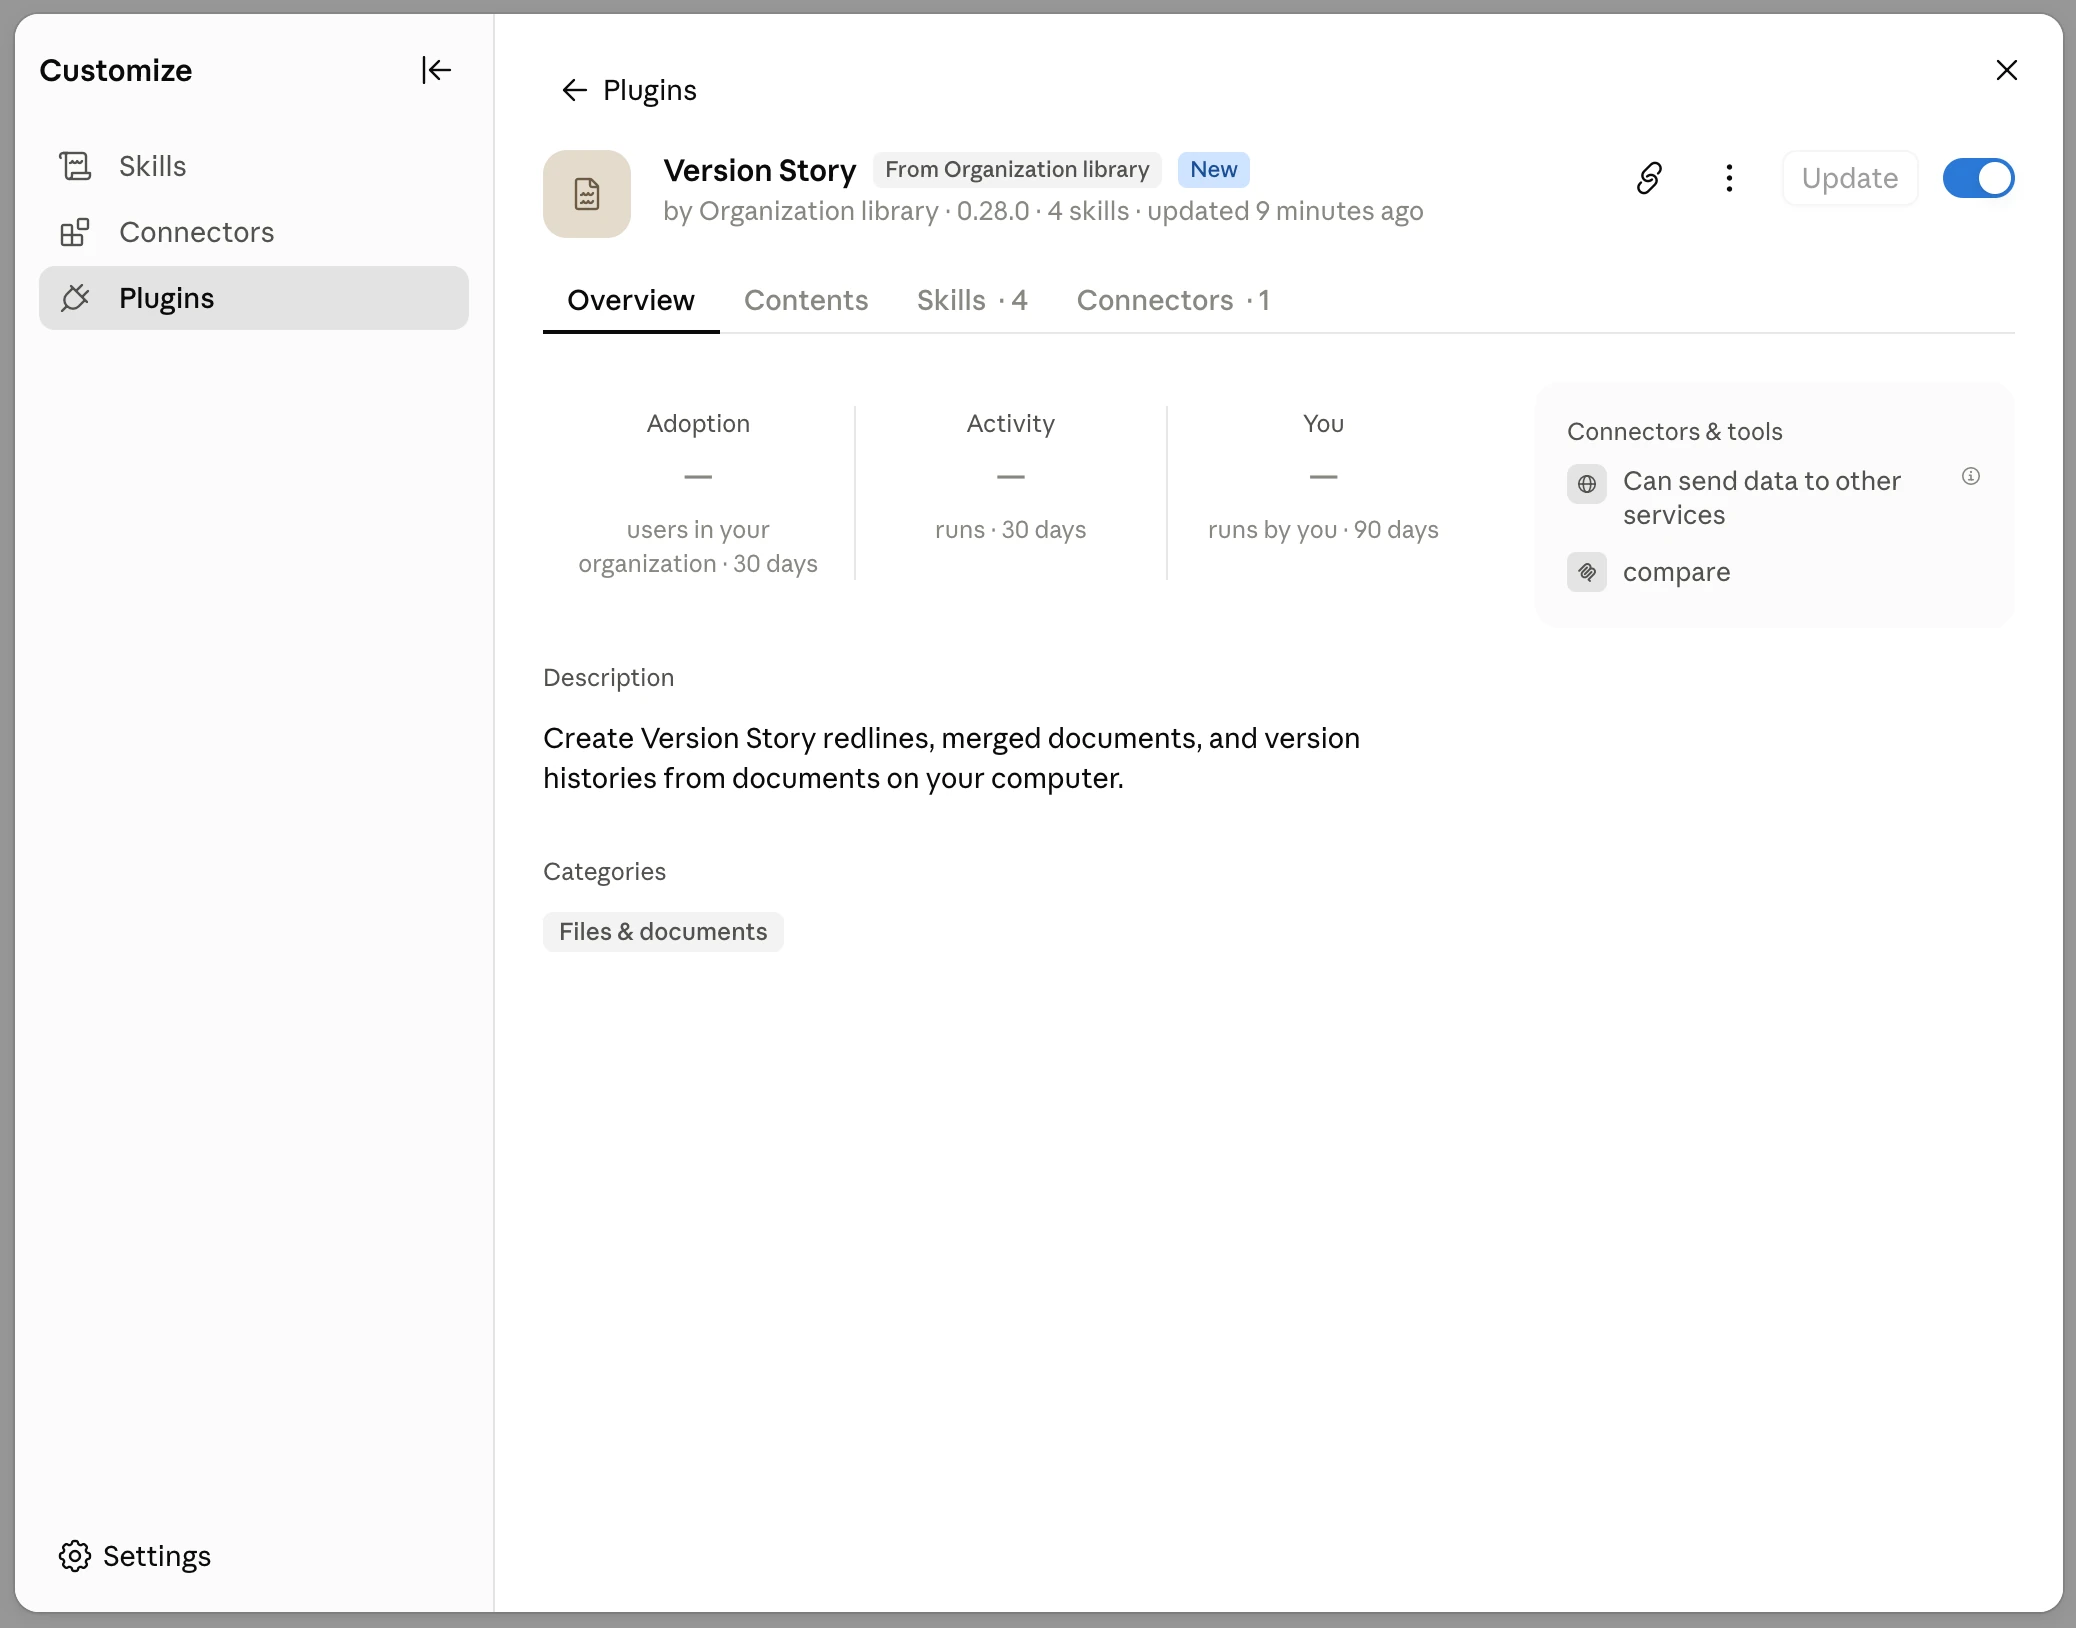
2. Click **Version Story**, then click **Add**.
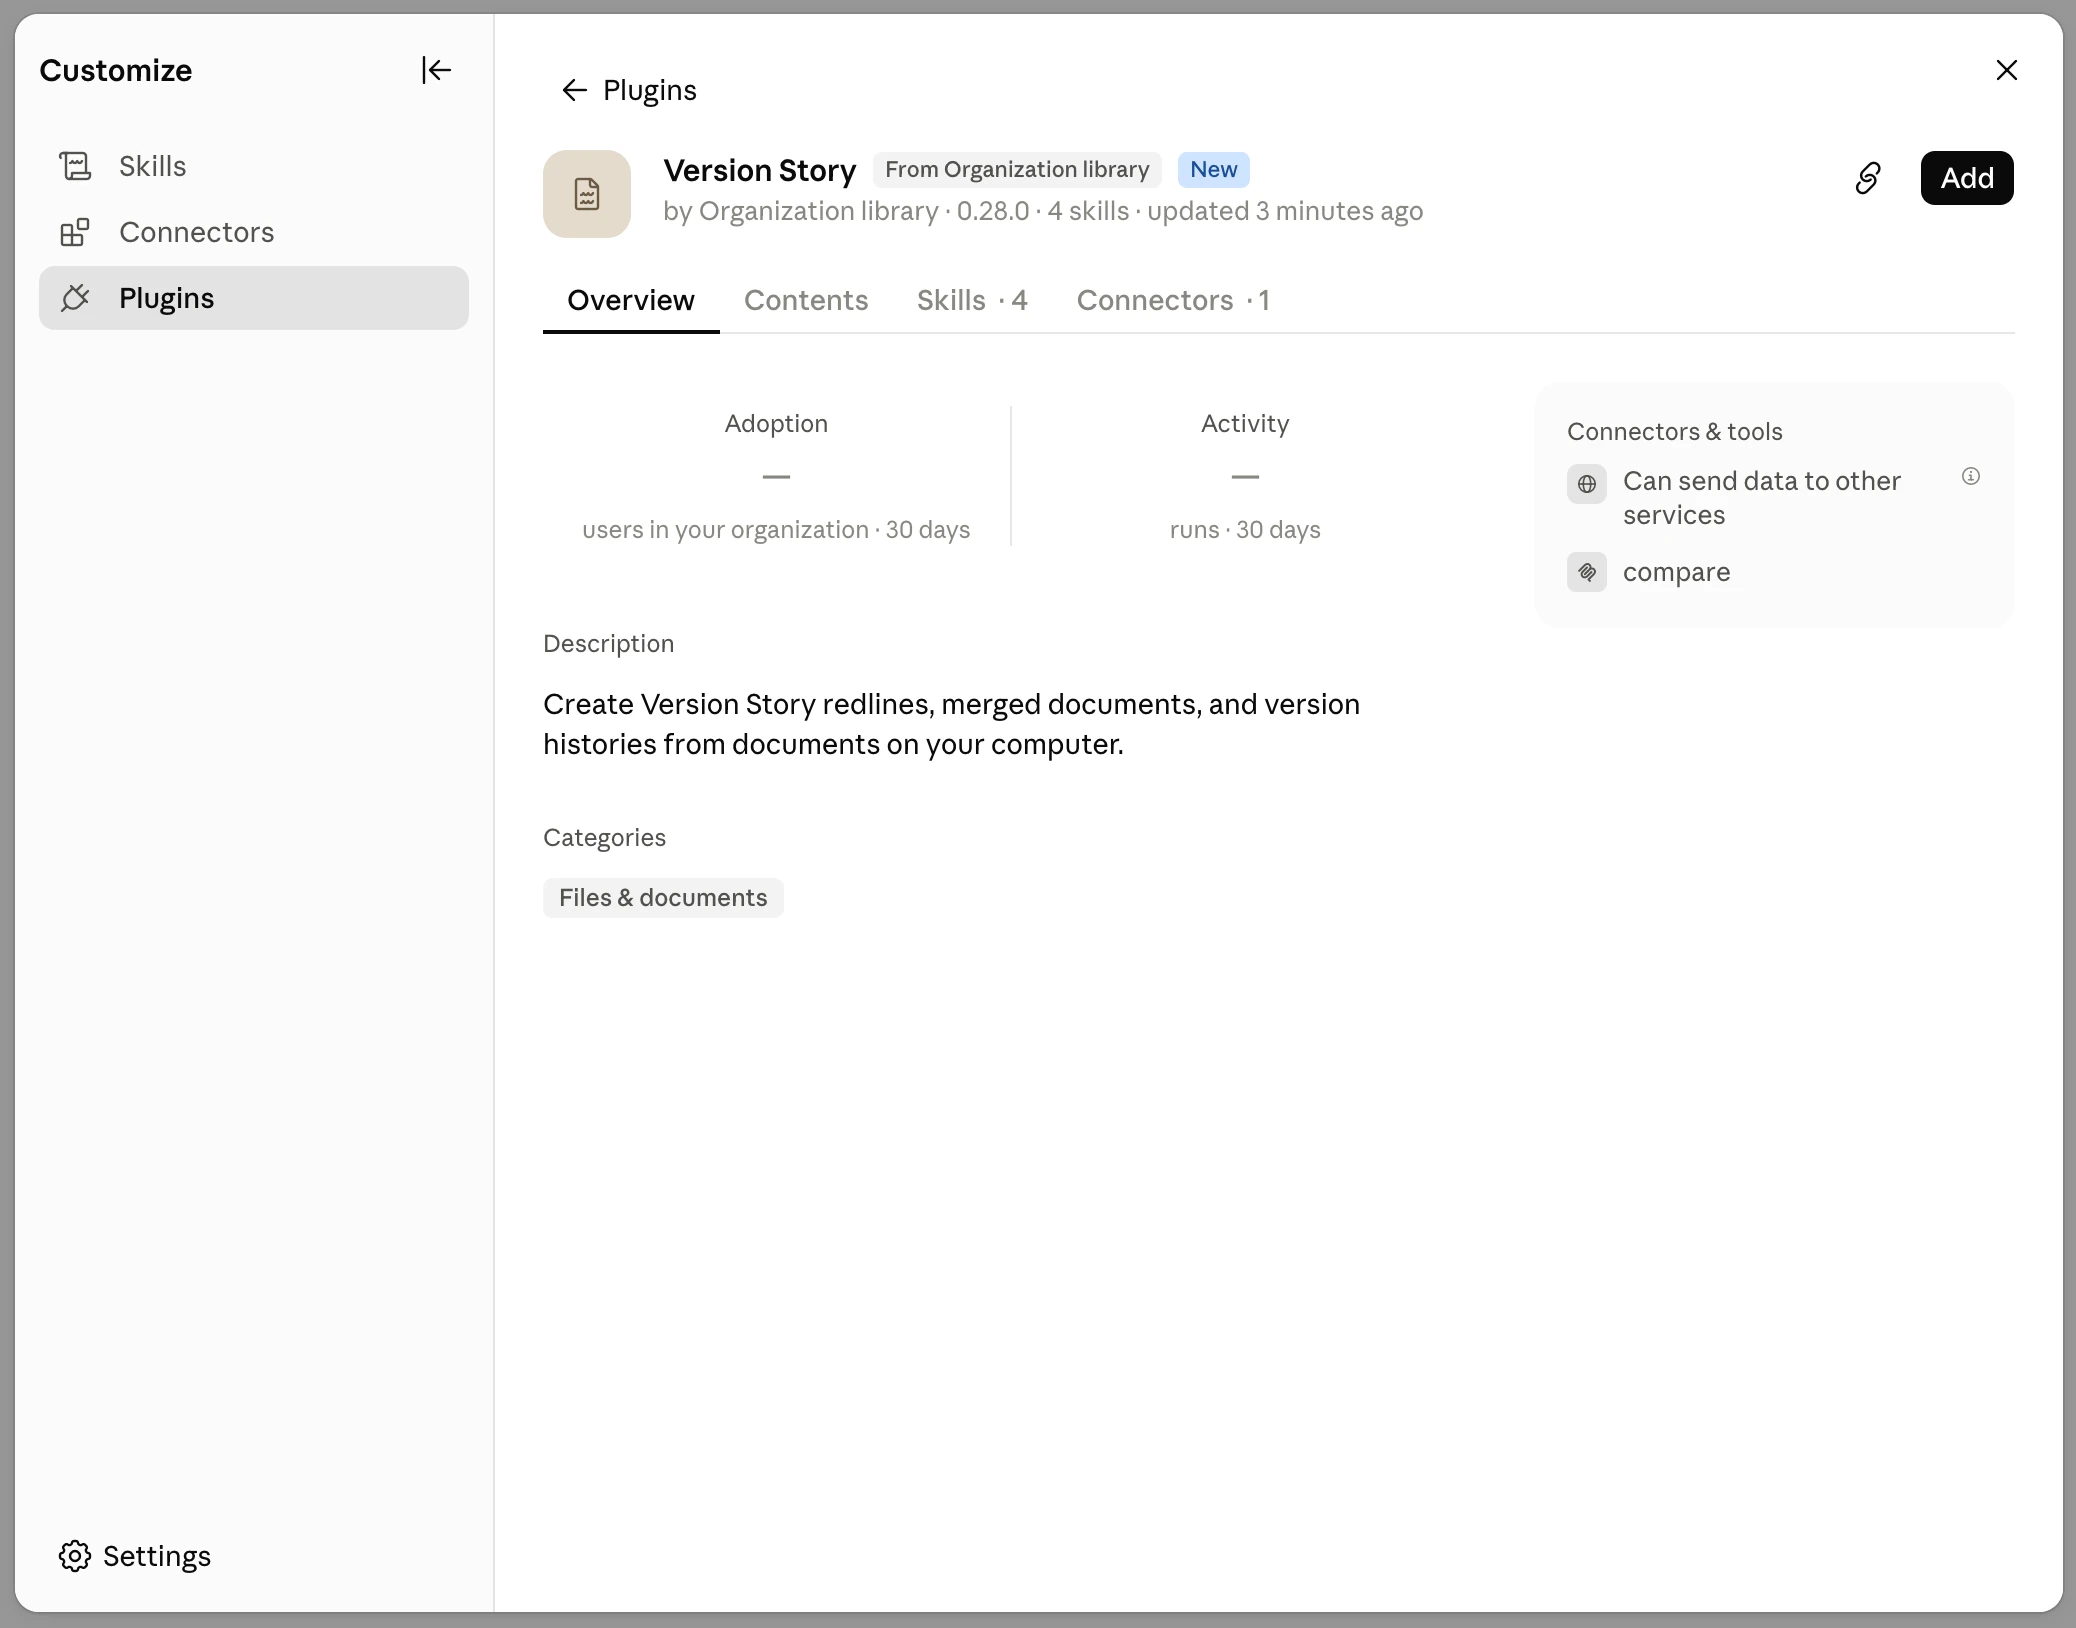
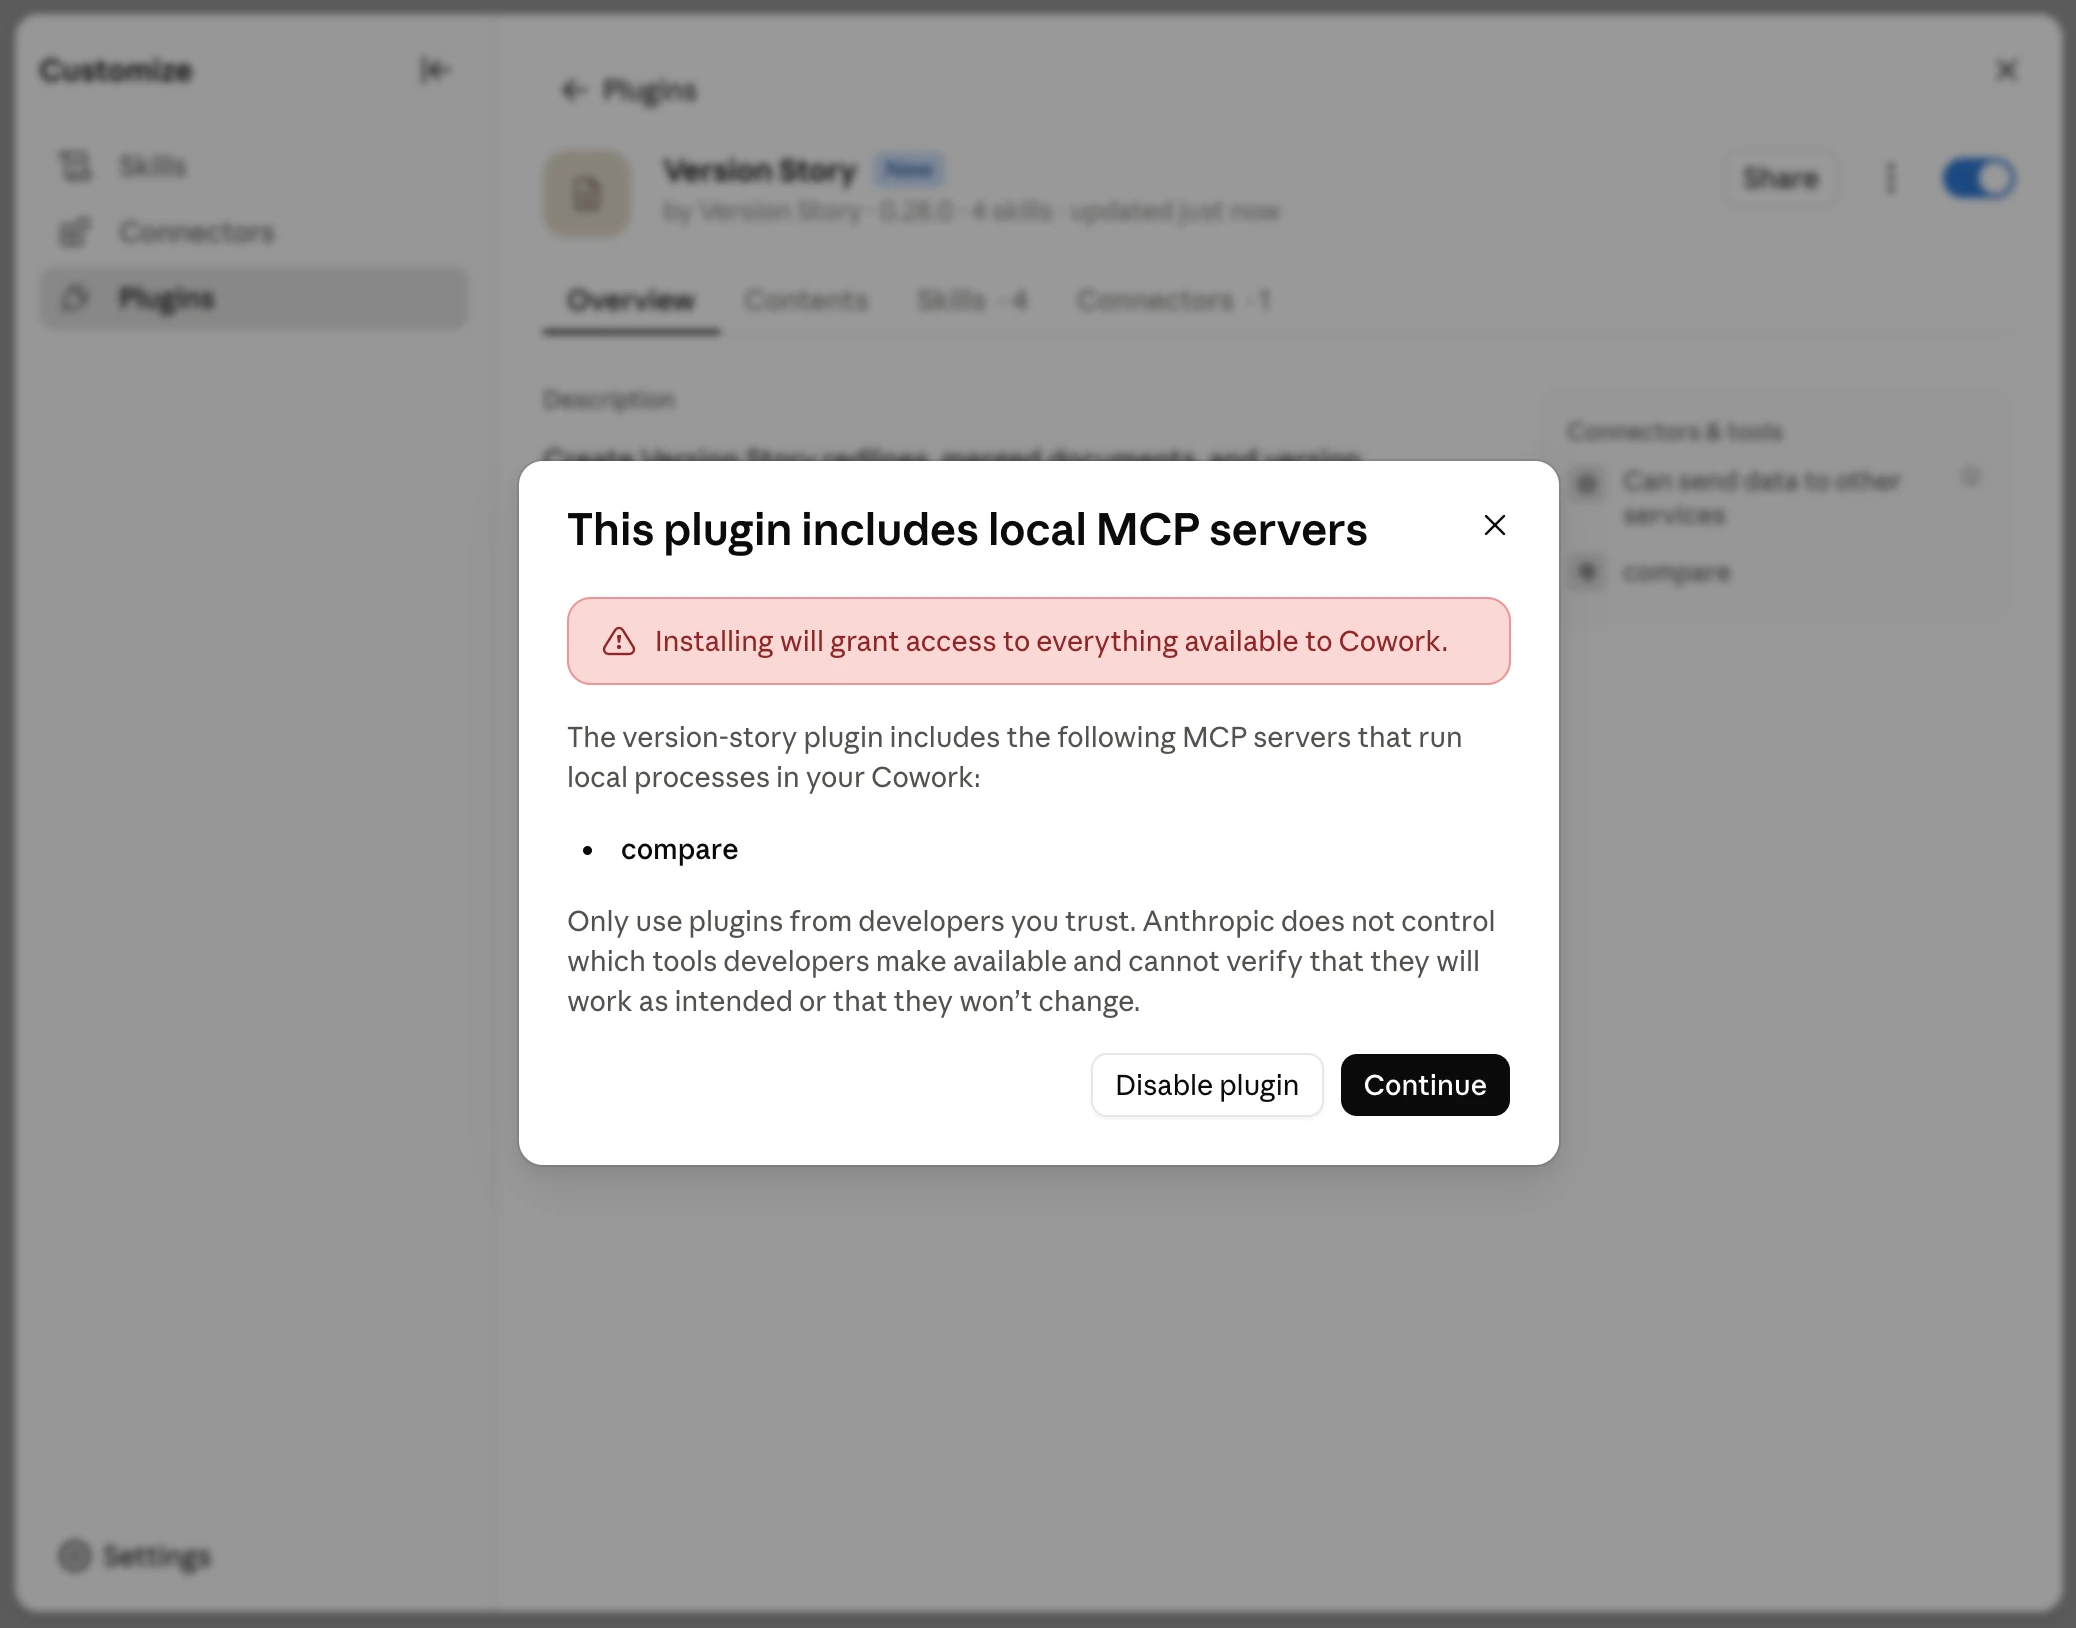
3. Claude points out that the plugin includes a local MCP server named `compare`. That is the
piece that does the comparison work on your own machine, so this is expected. Click
**Continue**.
4. The plugin turns on automatically. Its skills — `/compare`, `/merge`, `/combine`, and
`/version-history` — are available in Cowork.
- If the comparison tools are not available right away in the desktop app, quit and reopen
Claude — or wait about ten minutes, since the plugin finishes activating on its own — then
start a new conversation.
Set up on a personal account
### 1. Add the plugin
1. Download the plugin:
[version-story-mcp-plugin.plugin](https://assets.versionstory.com/plugins/version-story-mcp-plugin.plugin).
Your browser saves it to your Downloads folder.
2. In Claude, open **Settings → Customize → Plugins**.
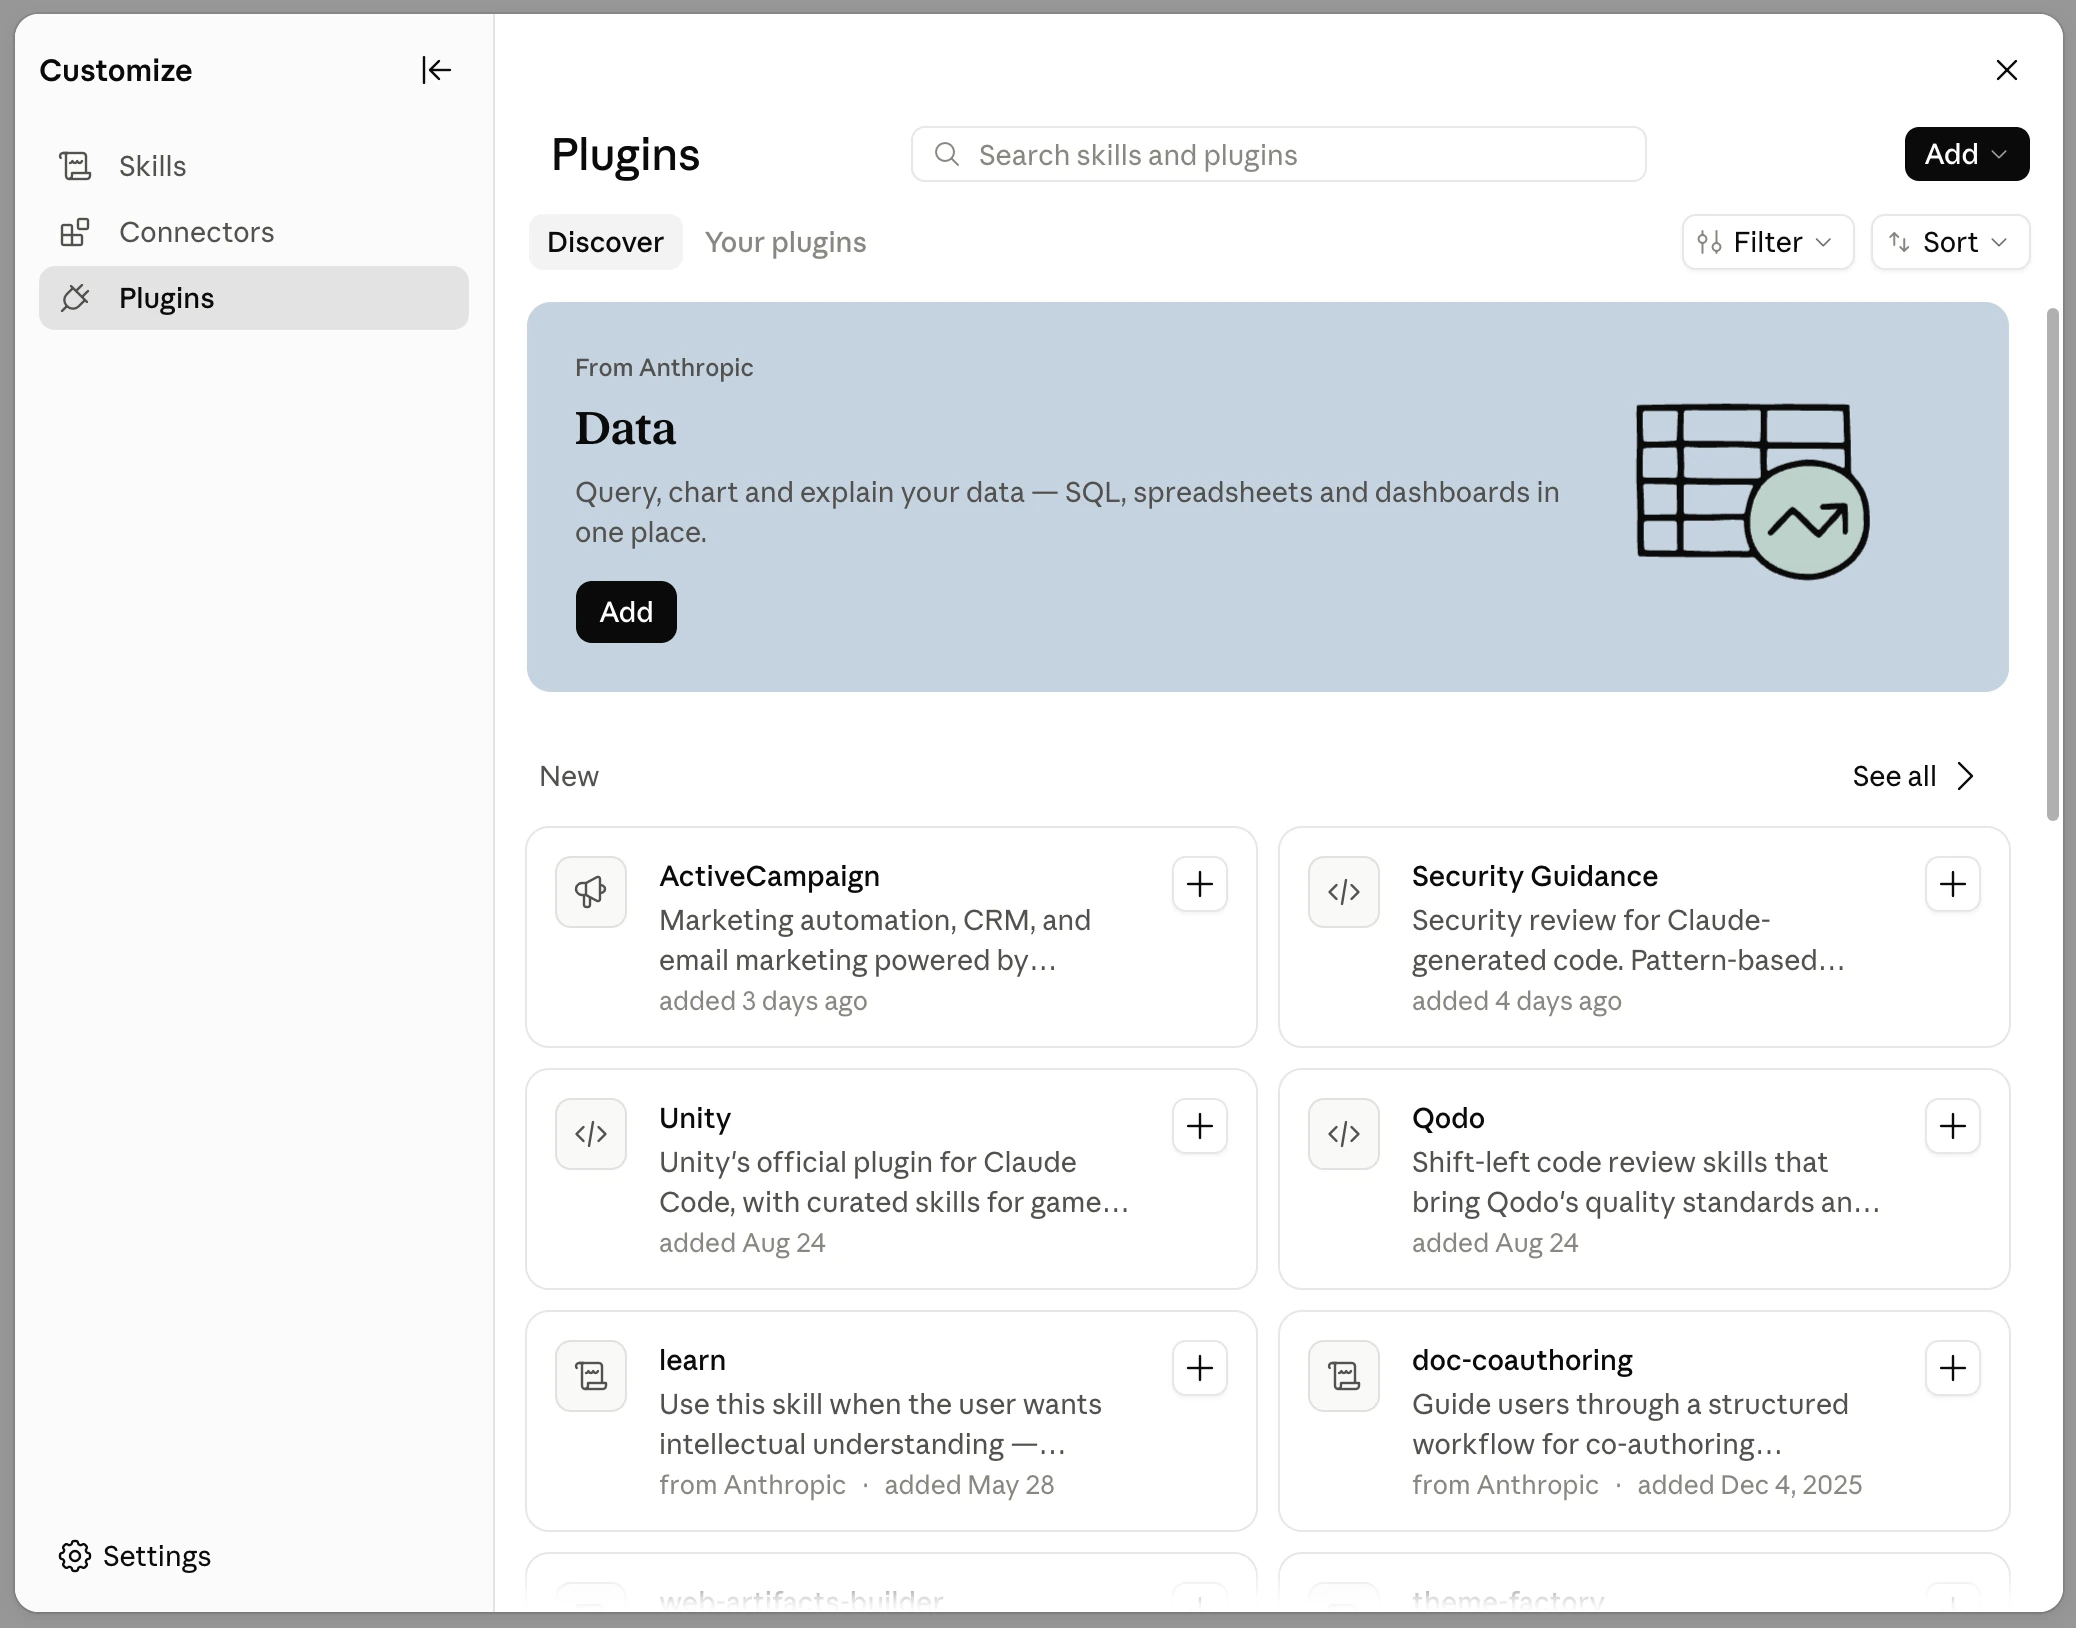
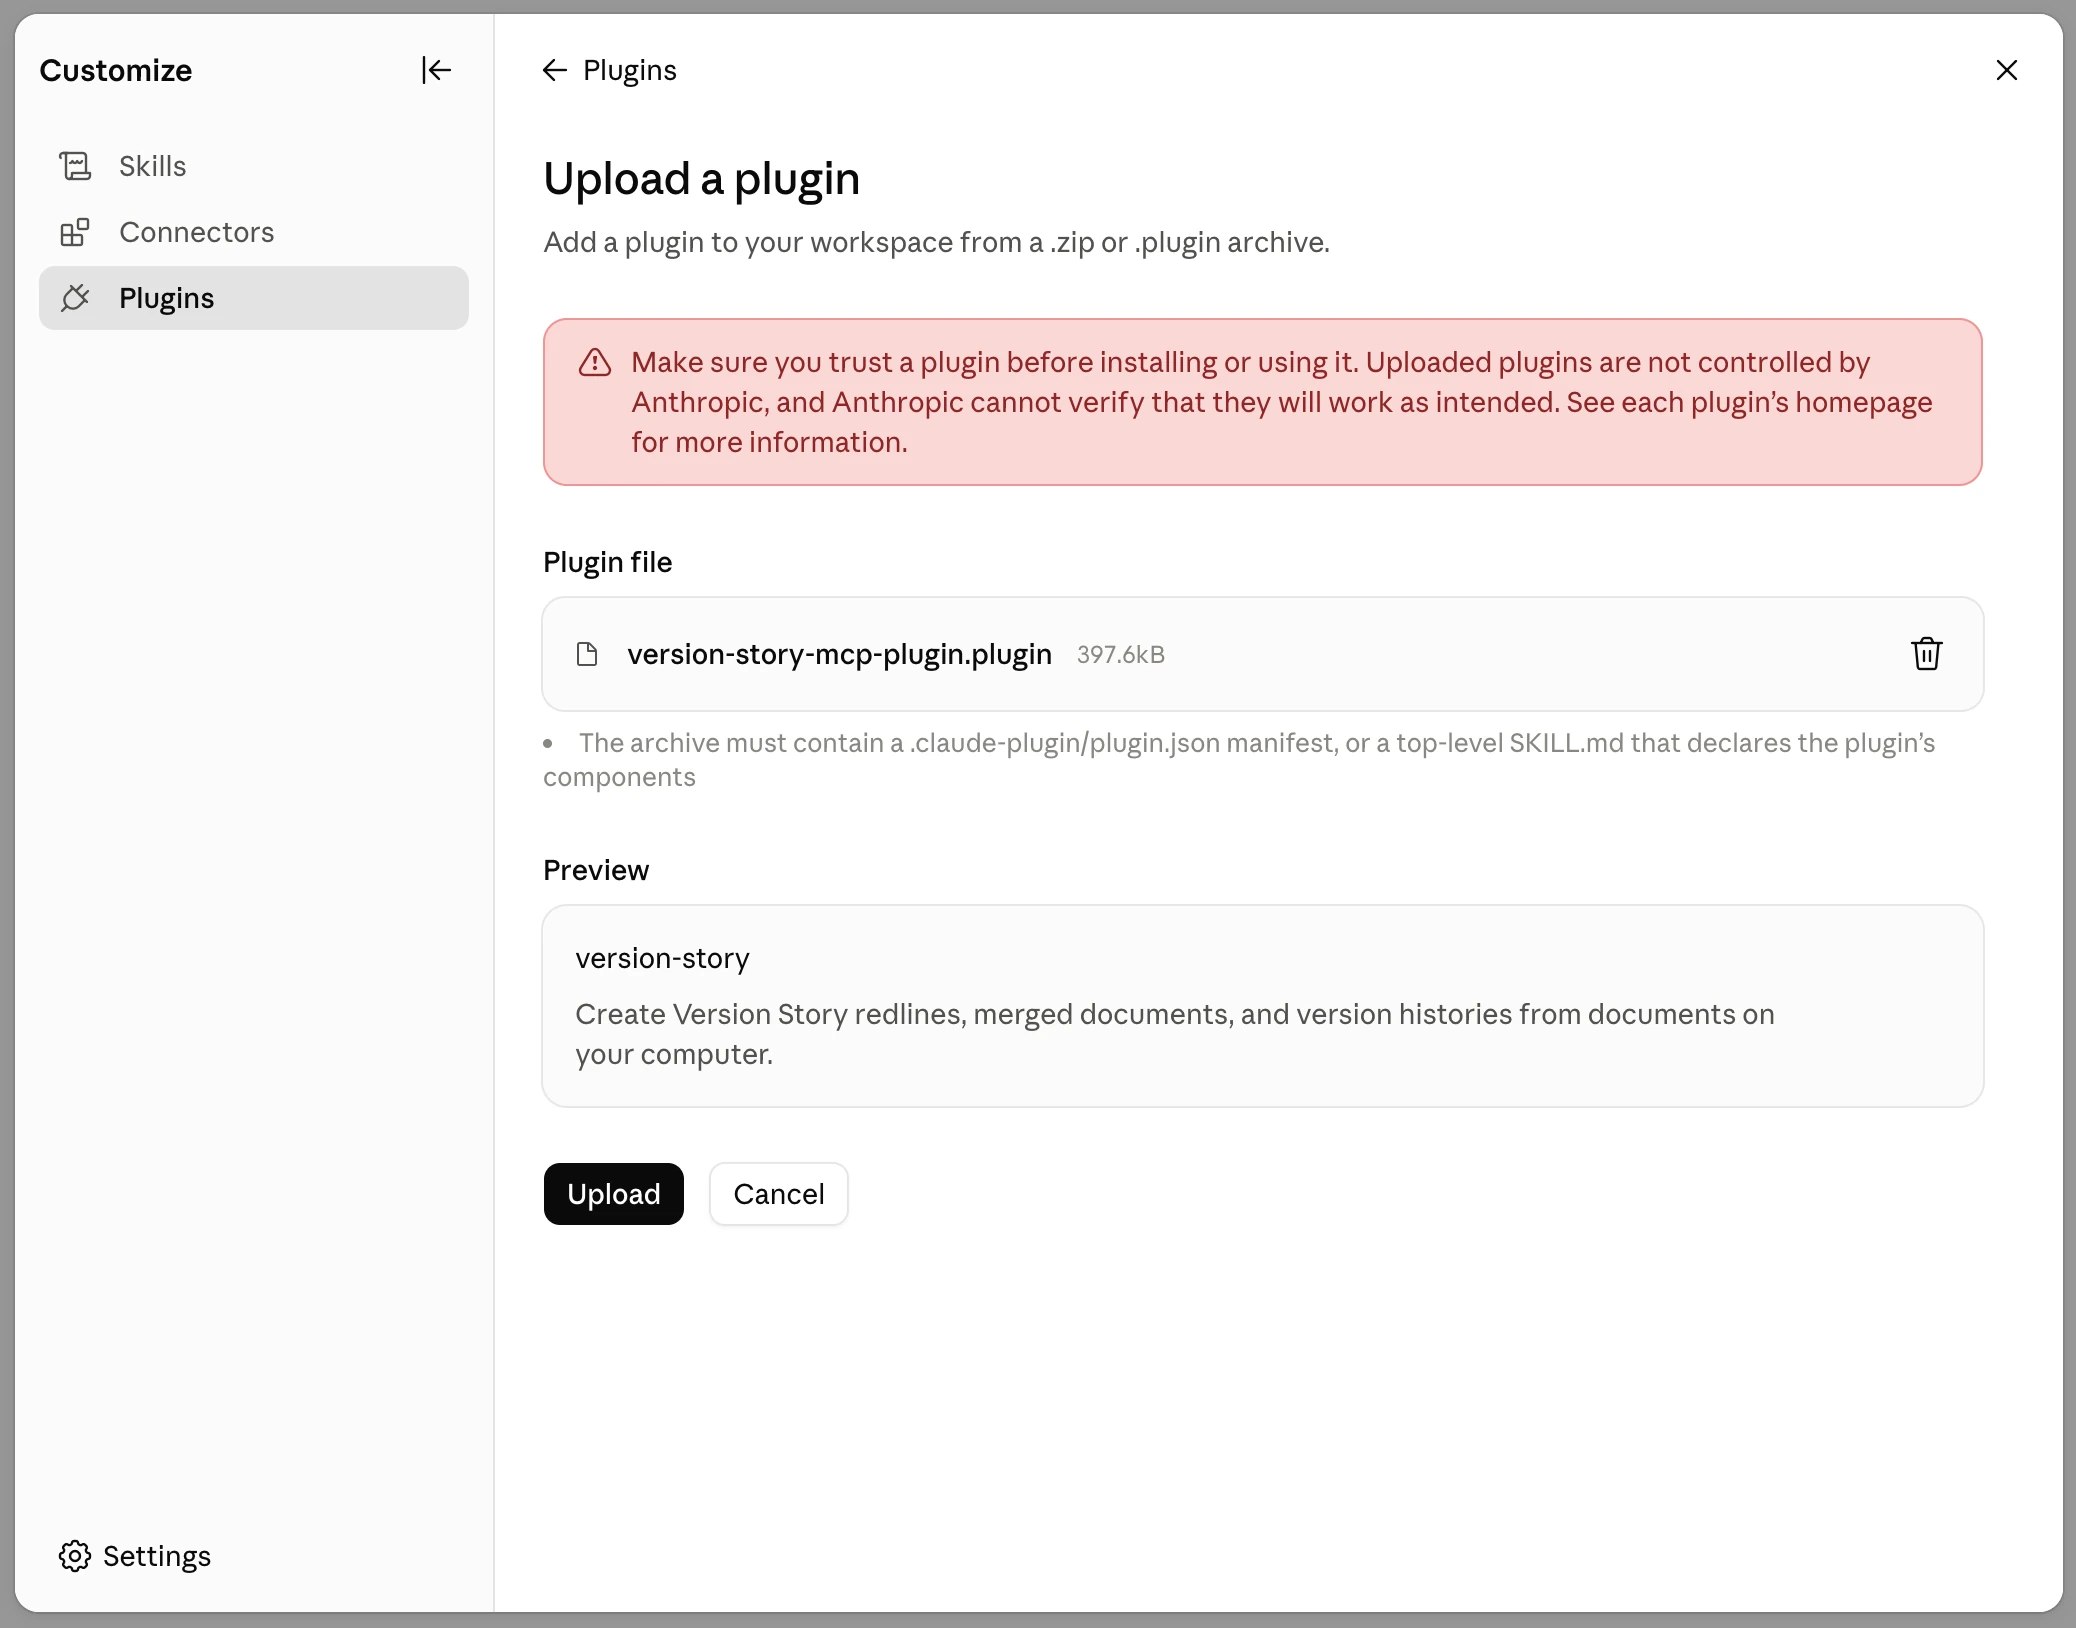
3. Click **Add → Upload plugin**.
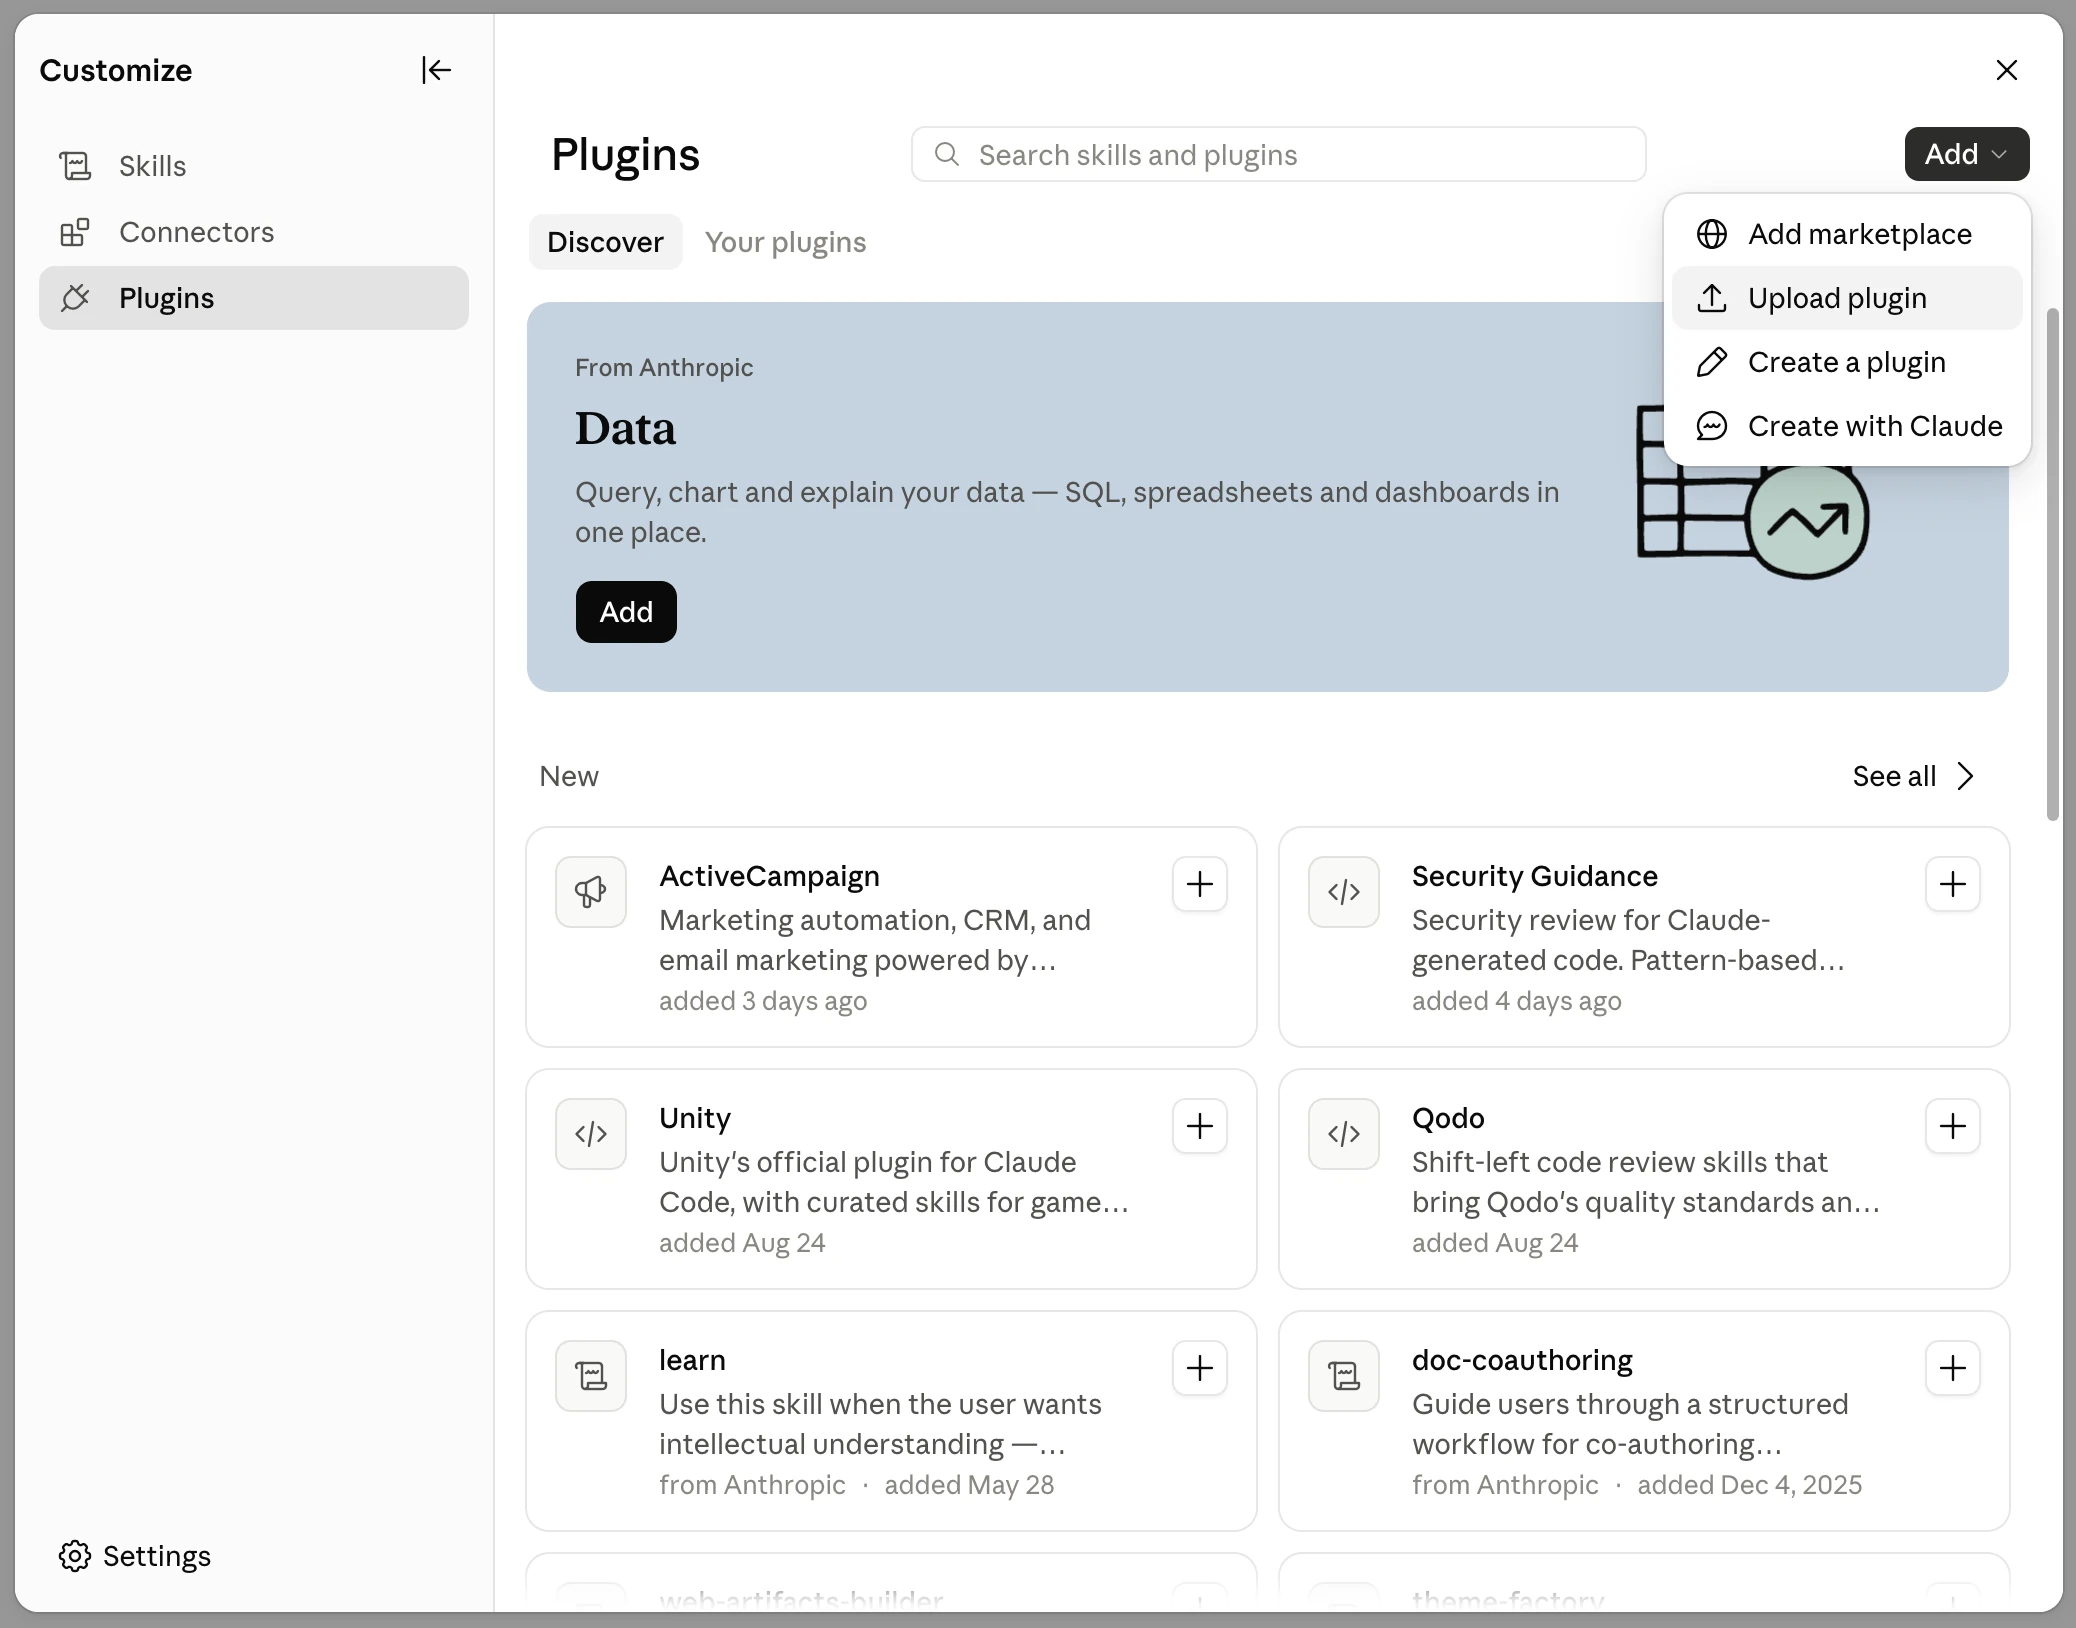
4. Drag the `version-story-mcp-plugin.plugin` file onto the upload area, or click **browse** and
pick it out of your Downloads folder.
5. Check that the preview reads **version-story**, then click **Upload**.
6. Claude points out that the plugin includes a local MCP server named `compare`. That is the
piece that does the comparison work on your own machine, so this is expected. Click
**Continue**.
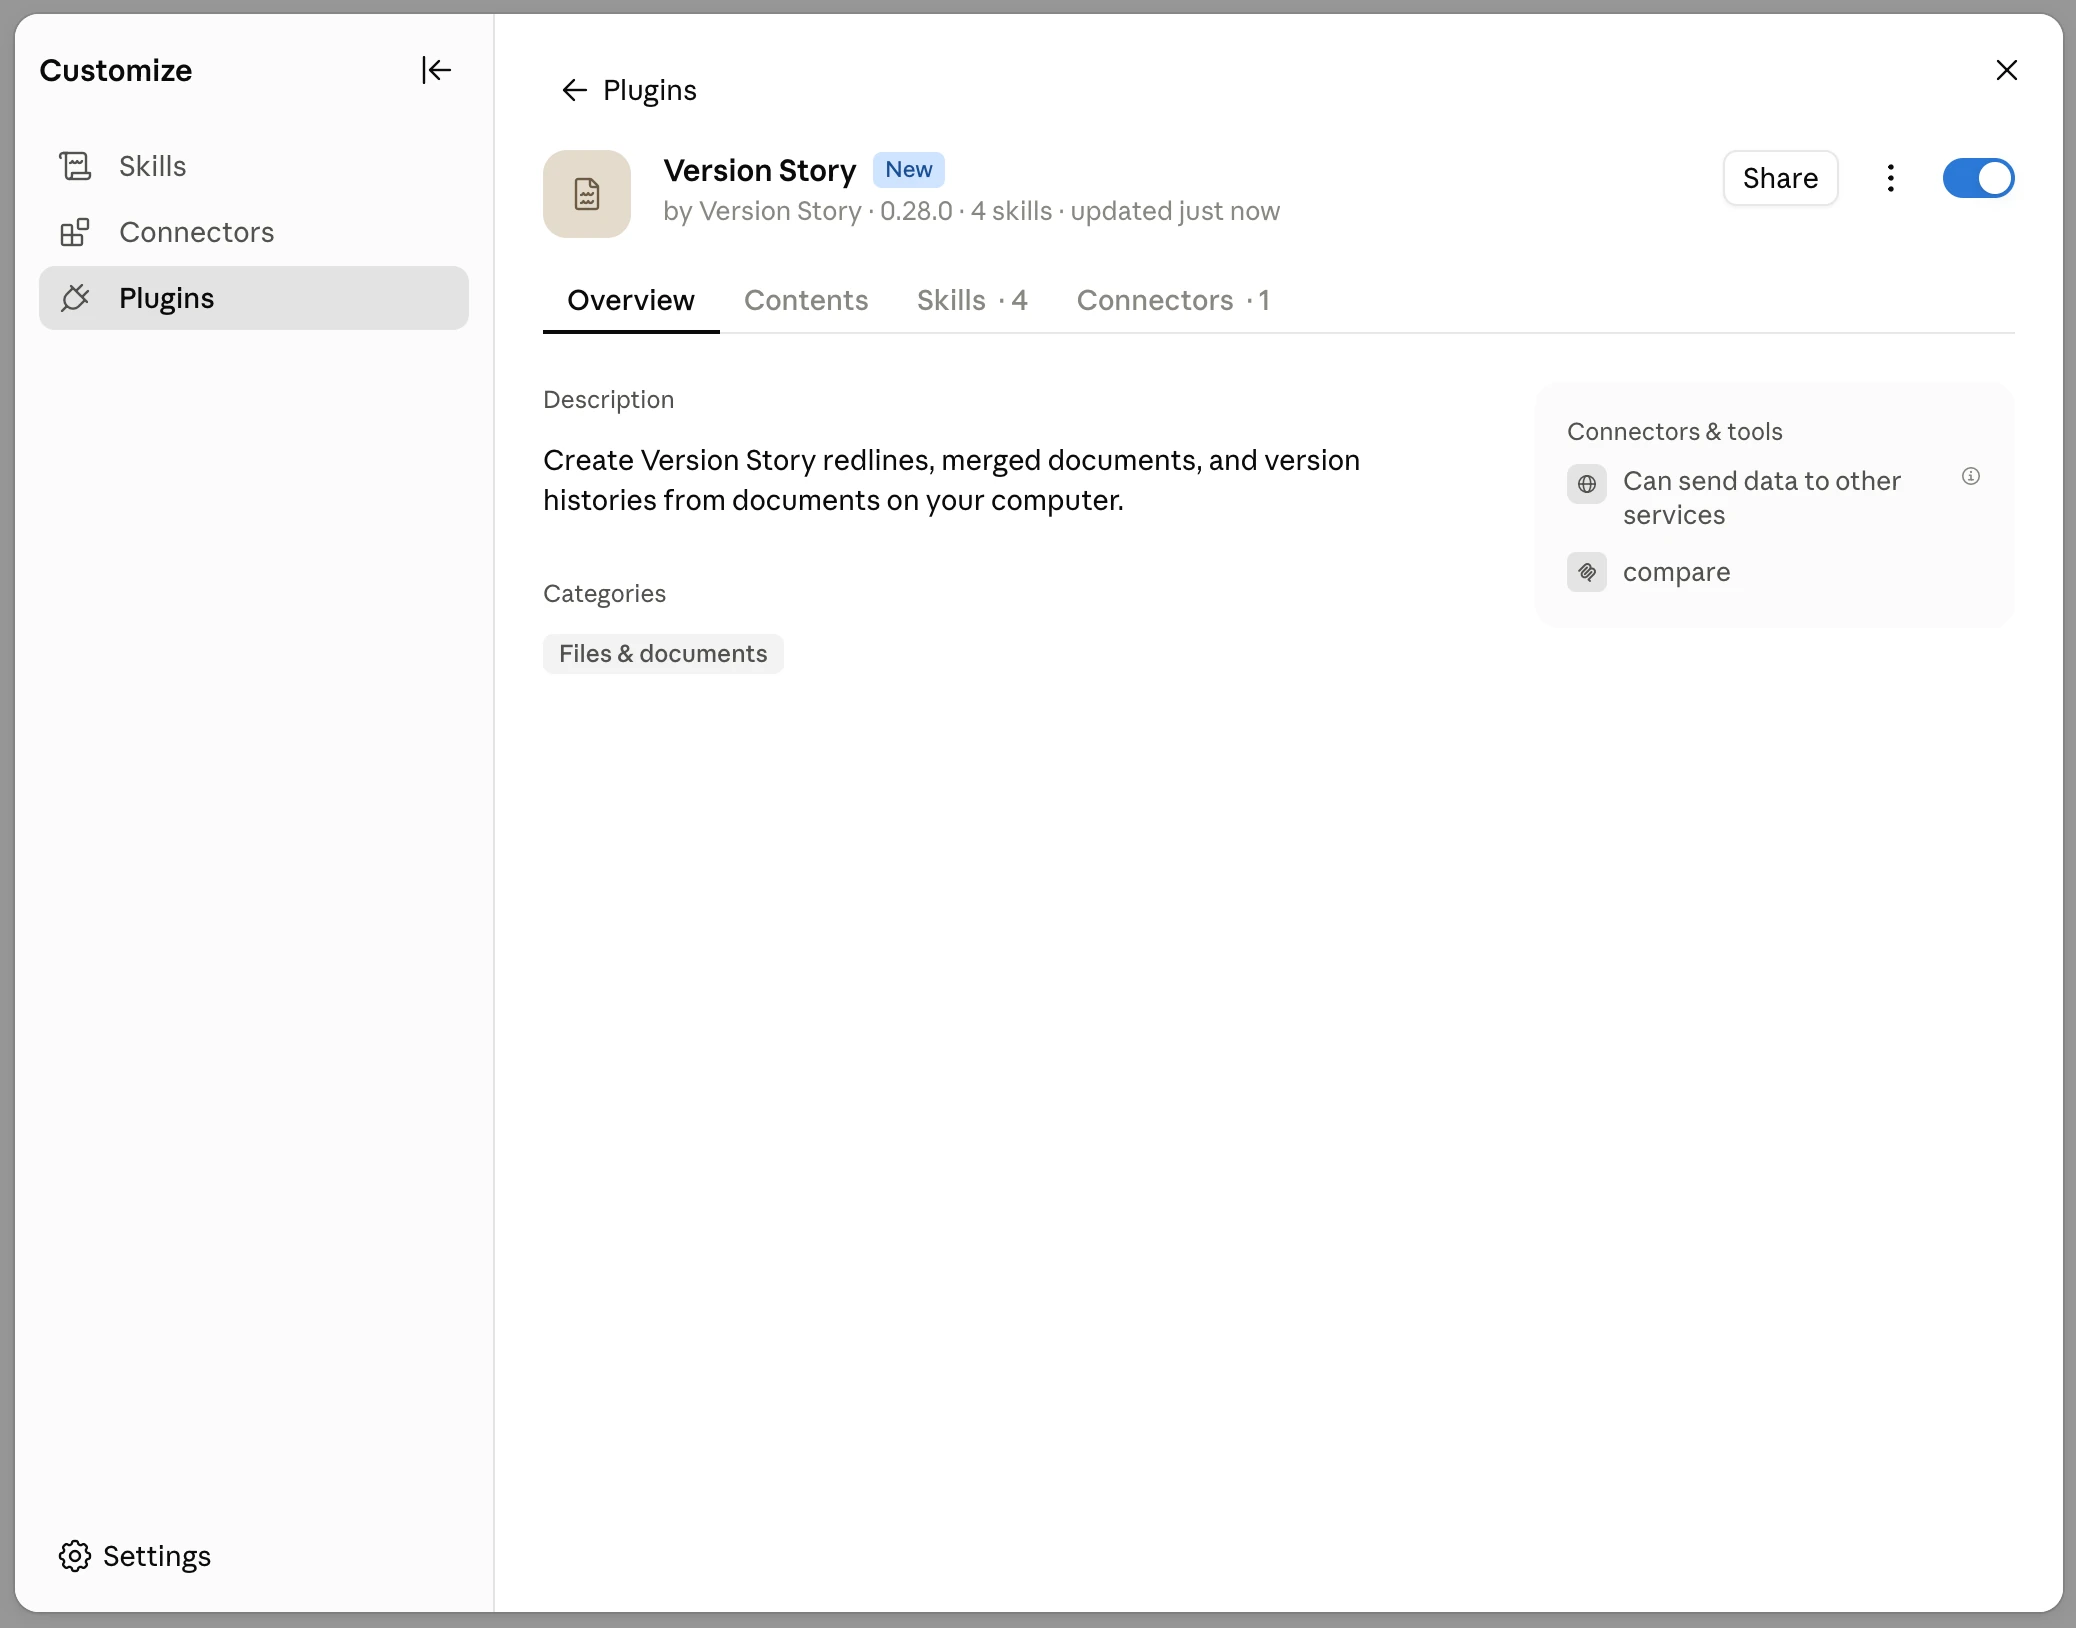
7. The plugin installs and turns on automatically. You will see **Version Story** listed with
its skills.
- If the comparison tools are not available right away in the desktop app, quit and reopen
Claude — or wait about ten minutes, since the plugin finishes activating on its own — then
start a new conversation.
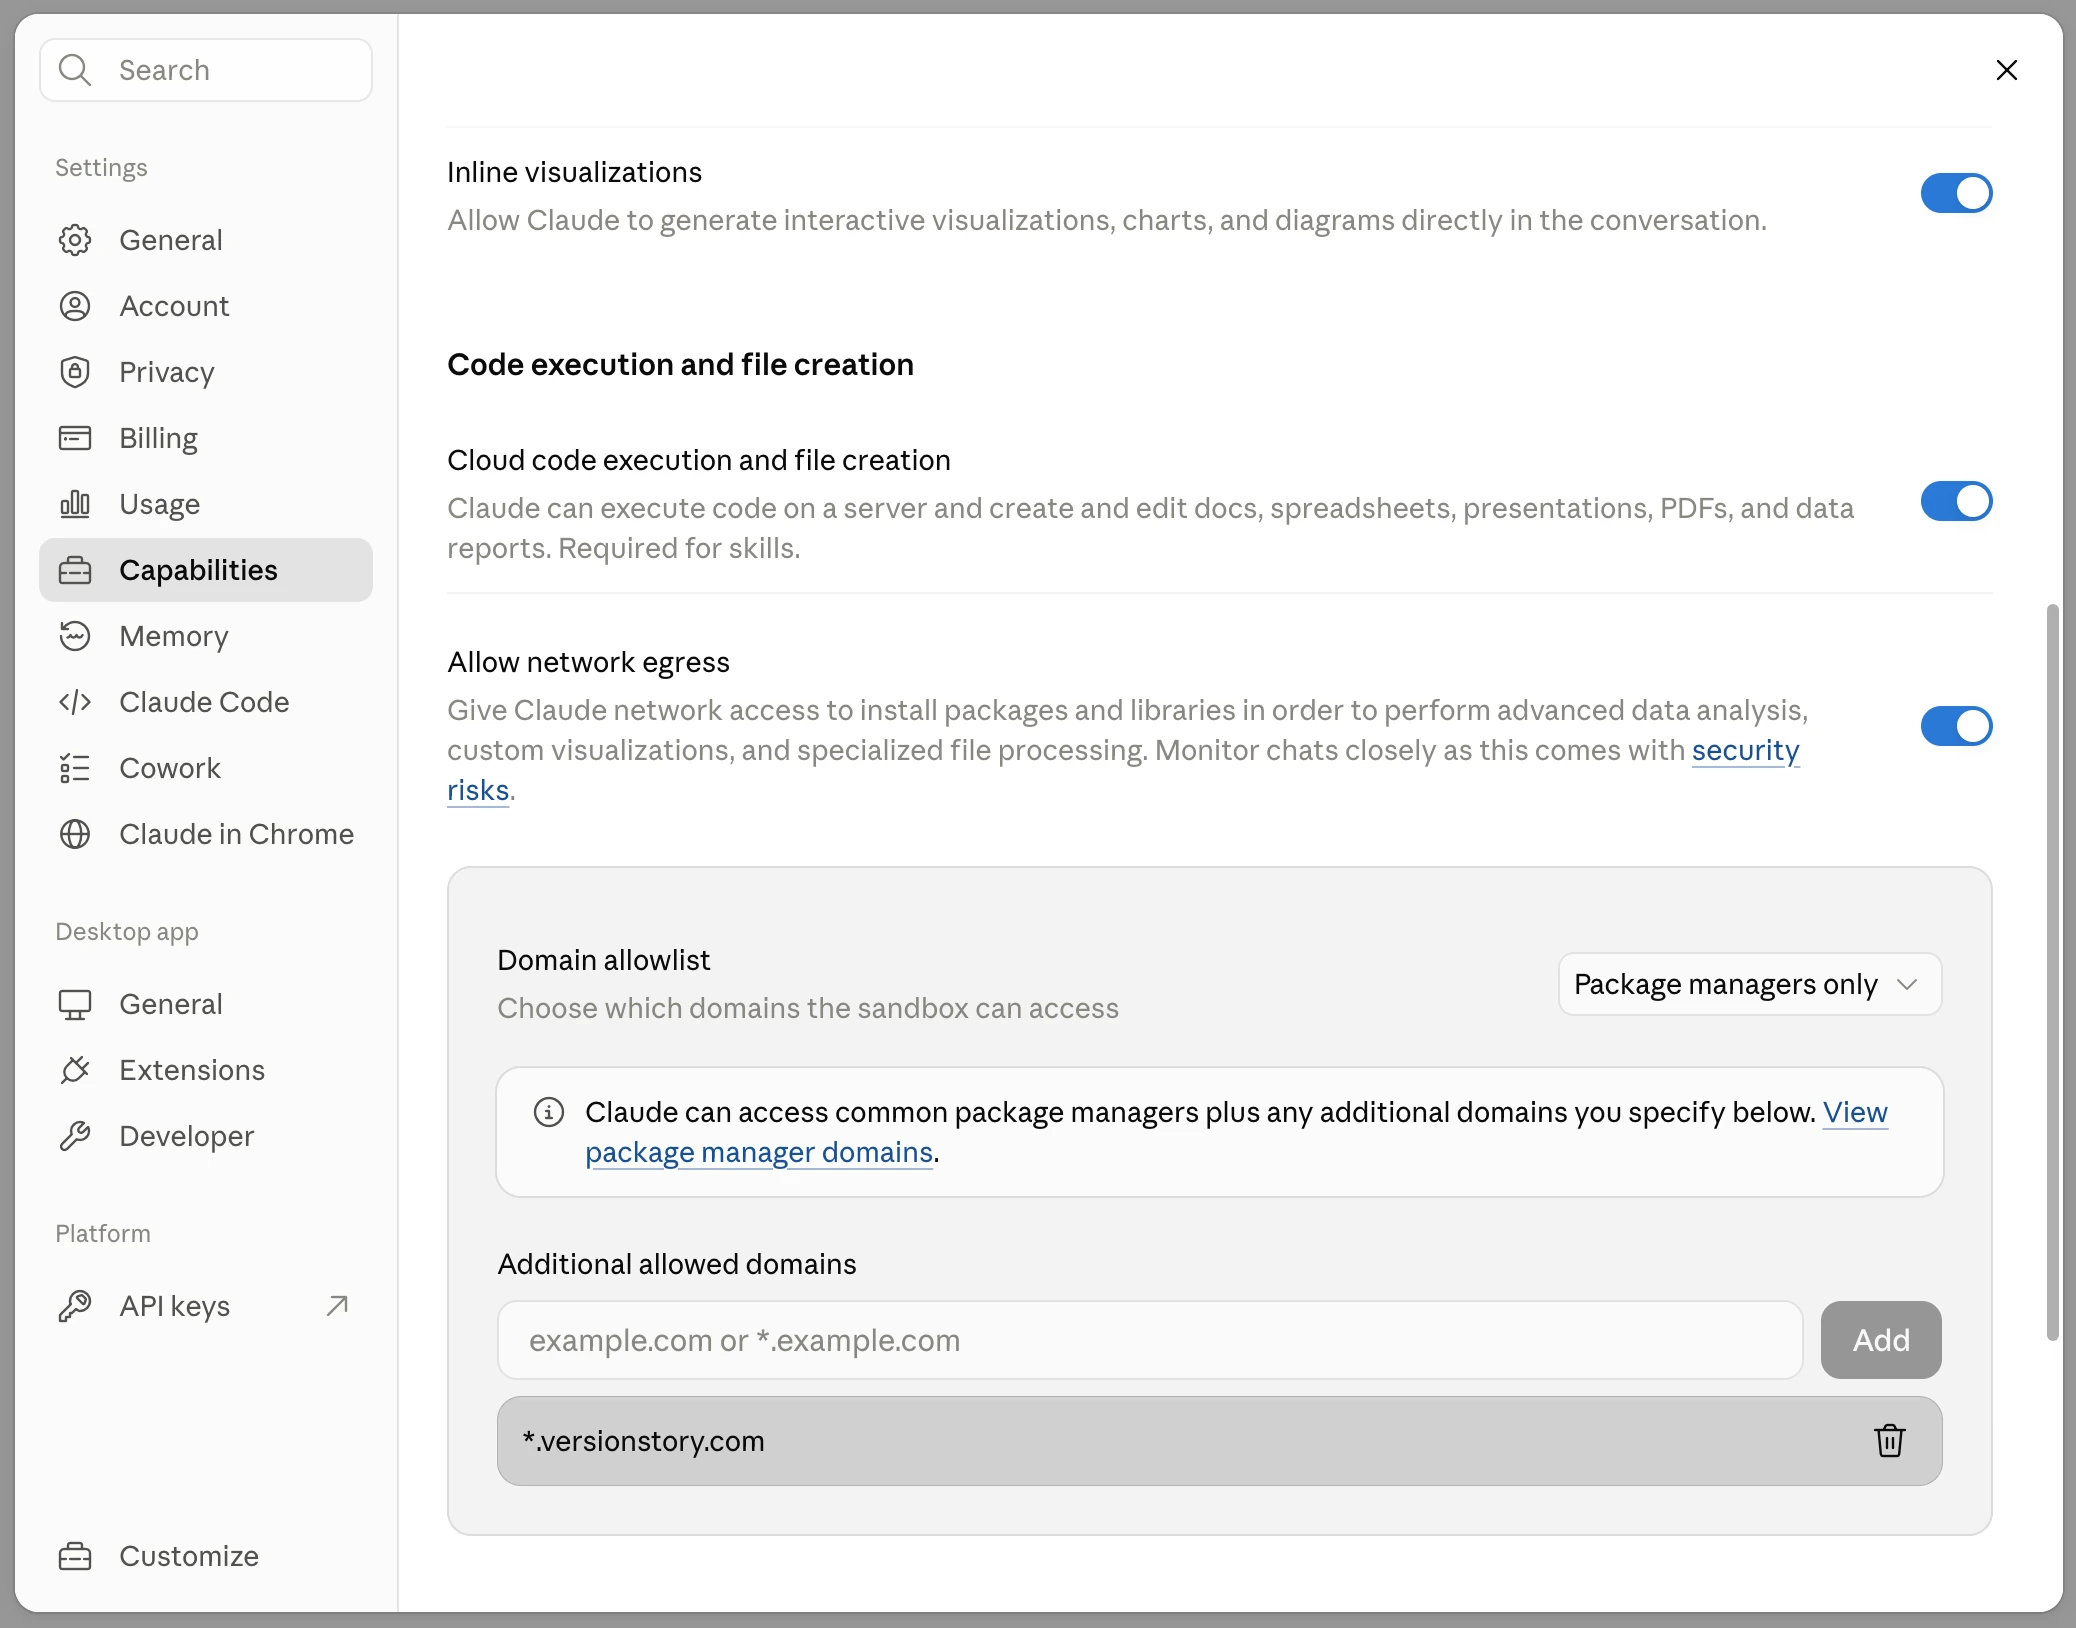
### 2. Enable code execution
1. Open **Settings → Capabilities** and make sure **Cloud code execution and file creation** is
turned on. The plugin cannot run without it.
- That first toggle is the only one the plugin needs. **Allow network egress** and the
**Domain allowlist** below it belong to the connector, so leave them however you found
them — the plugin transfers documents from its own process.
## Update your system prompt
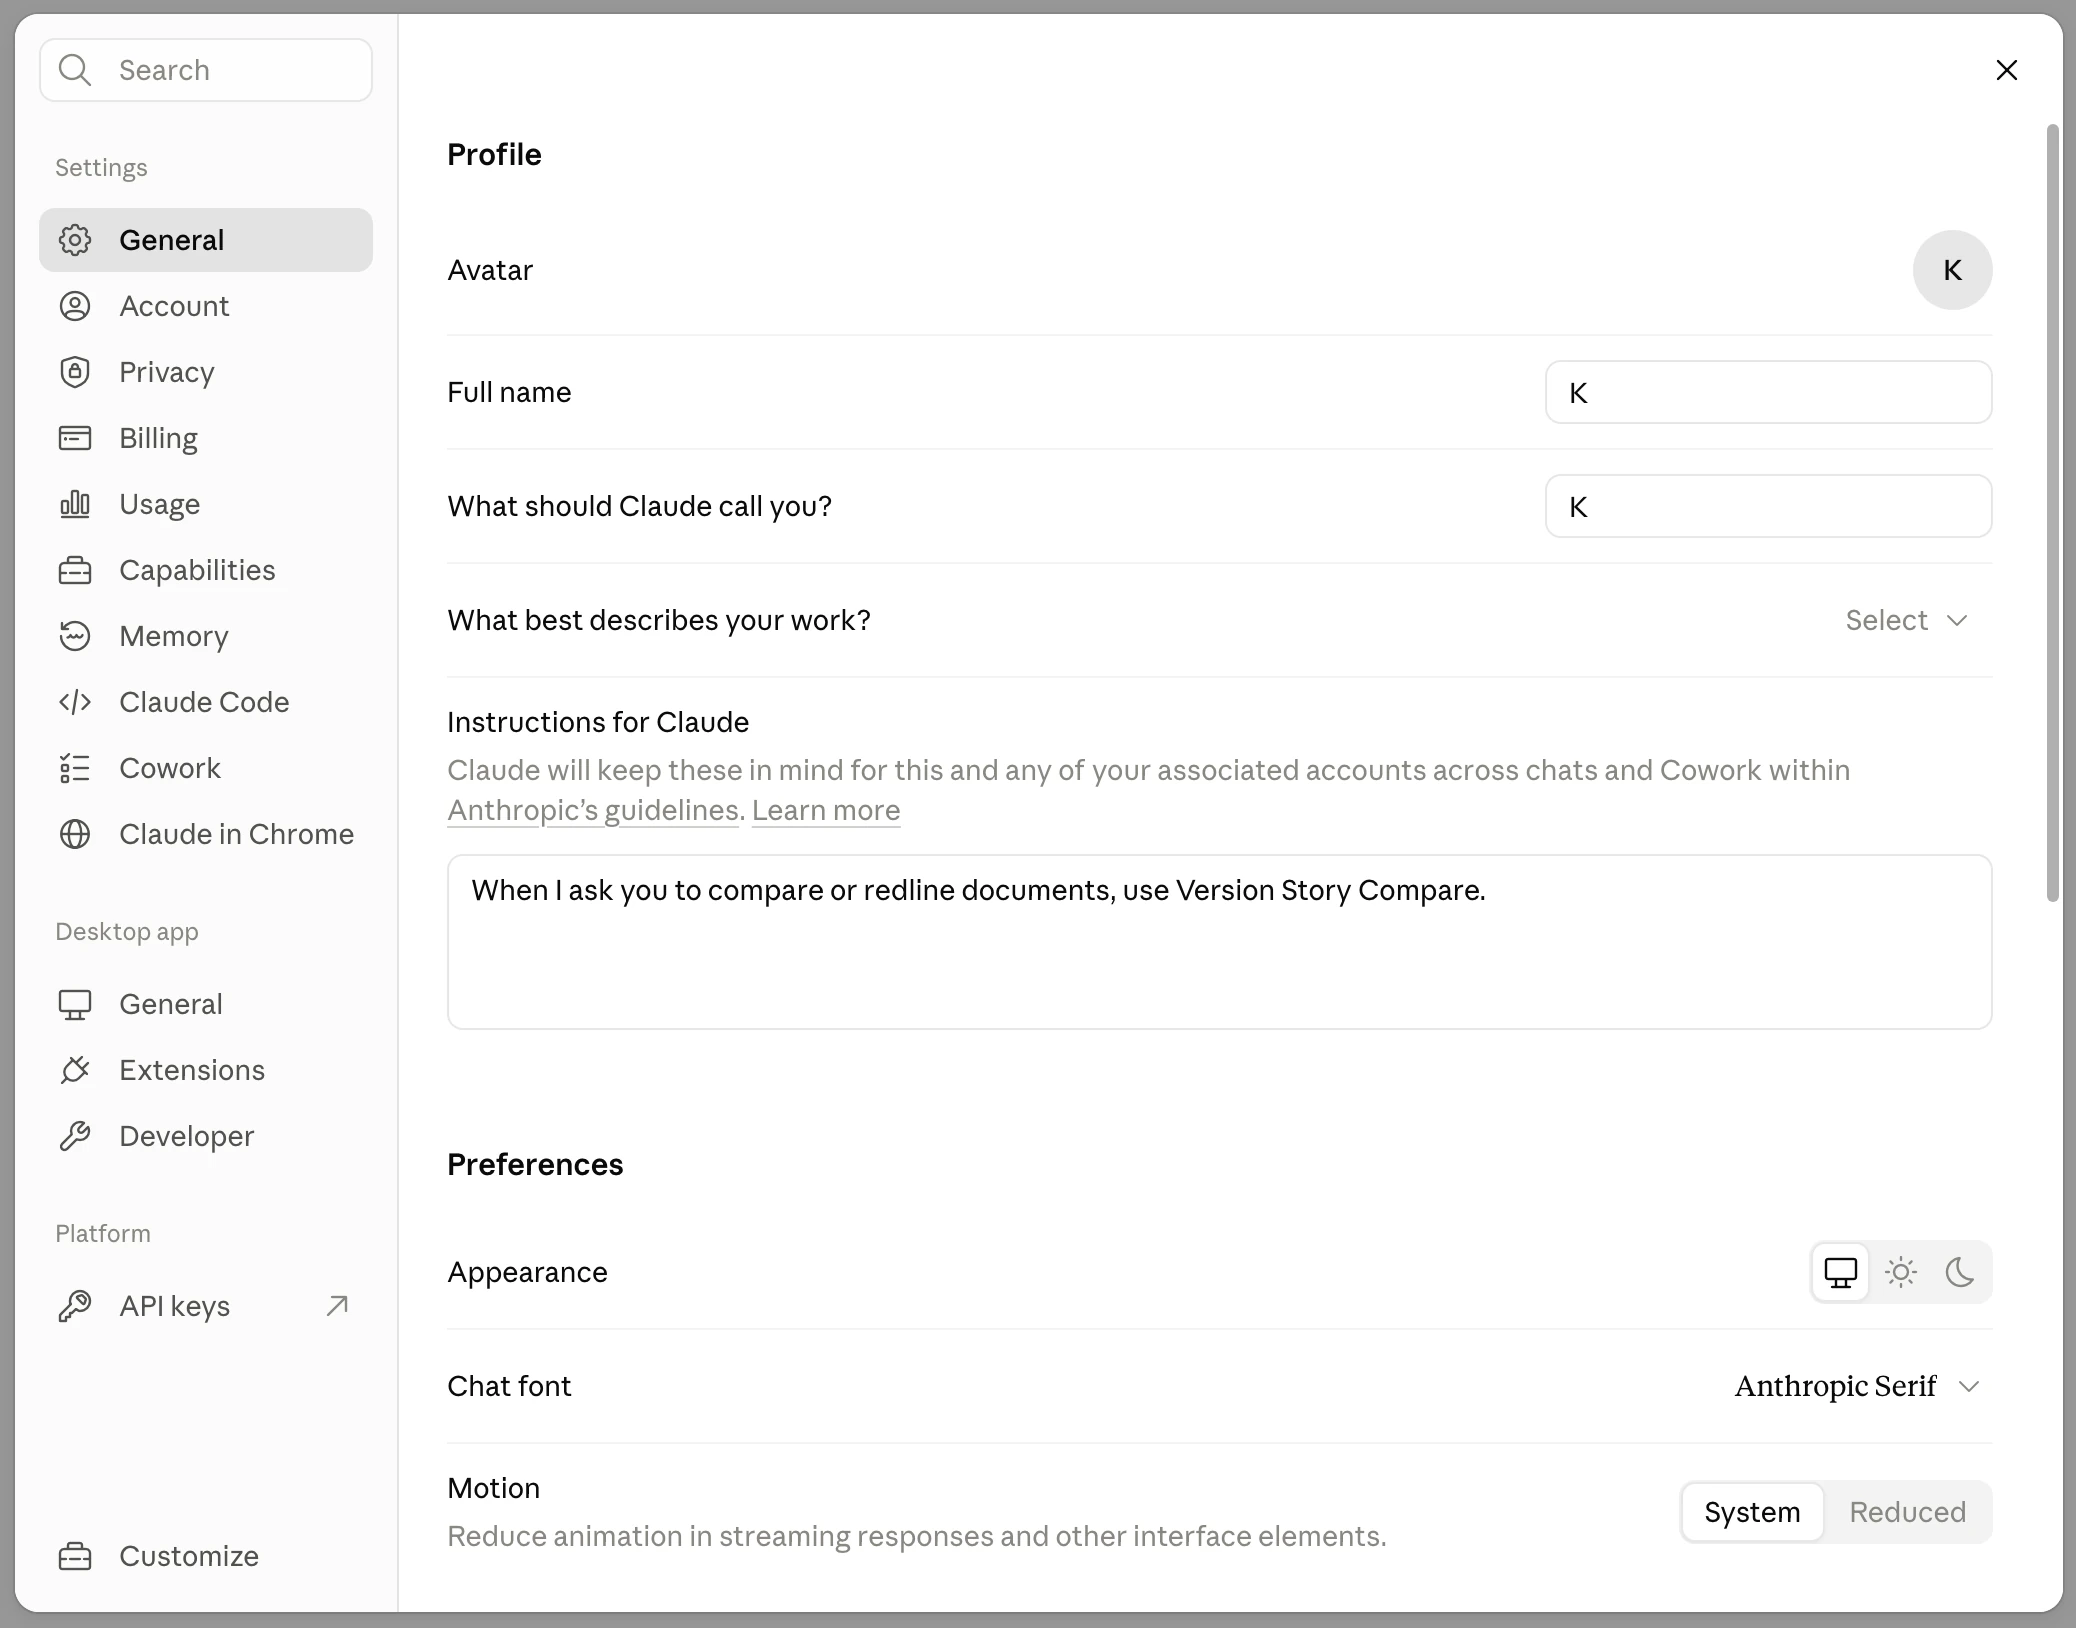
Under **General → Instructions for Claude**, add the following line:
```
When I ask you to compare or redline documents, use Version Story Compare.
```
This tells Claude to reach for Version Story on its own whenever you ask for a comparison, so
you never have to name it in a prompt. Your settings should look like this:
## Test it
Start a new Claude session — Cowork works great — point Claude at two versions of a document in
one of your folders, and ask it to redline them using Version Story. Claude will return an
interactive redline link and the redline file itself.
The plugin does not run in plain Claude Chat. To cover that case as well, add the connector:
see the [MCP server installation guide](/developers/mcp/claude-installation-guide). Adding both
is safe — Claude merges them into one tool set and prefers the plugin.